|
|
The commands are temporarily removed. To get them back, close and then re-launch Visual Studio. |
RADE |
C++/JAVA Interactive Dashboards |
Working with the RADE Dashboards - Part 1Principles of use - How to open and build a CAA V5 workspace |
| Technical Article | ||
AbstractThis article describes the menus available in Visual Studio .NET that enables you to access the CAA V5 tools. In this topic, we will explain some principles of this customization and describe each new item. If you use the C++ Interactive Dashboard and your Visual Studio .NET environment has not been set up for CAA V5 tools, see Customizing Microsoft Visual Studio .NET [1] that will provide you with the information you need to set it up properly and to migrate a CAA V5 File Tree to a format which is usable by Visual Studio .NET. If you are interested in getting familiar with Source Code Manager functionalities, see Working with the RADE Dashboard & SCM" [2]. If you want to develop new CAA V5 components and to use of CAA V5 builders, see Code Generator Features" [3]. Finally, if you are familiar with CAA V5 commands, the topic entitled "Workbench Commands Mapping" [4] will give you the correspondences between DOS/shell commands and the dashboard menus and windows. |
Developer Studio uses the concepts of "workspace" and "project".
With Visual Studio .NET the concept of "workspace" is replaced with the
concept of "solution". A solution is an area that contains projects, a "project"
is defined as a set of files that produces a program/library or a final binary
file.
CAA V5 tools manipulate related concepts:
[Top]
The customization of Visual Studio .NET includes:
[Top]
Mkmk and related features are available in the following menus:
File,
Edit,
Project,
Build,
CAA
V5 Workspace,
Debug,
Tools,
Window,
Help. Additional CAA V5 Commands
are found under the menus:
File->Add CAAV5 Item,
File->Add CAAV5
 Project
. Note that these menus are not all available when
launching Visual Studio .NET. You must first select
New CAA V5 Workspace... or
Open CAA V5 Workspace.
[Top]
When first launching Visual .Net, CAA V5 Commands are located in particular menus. If you do not move them, they will always be located in these menus. However, you can change these commands locations. To do so, select Tools->Customize.... In the Customize dialog box, select the Commands tab, select Addins, select the command you want to move and drag and drop it onto the desired menu. This customized configuration will be unchanged when closing and re-opening Visual .Net. If you want to get back the default configuration, select Tools and select alternatively the following commands:
Remove Mkmk Add-in commands from menus
Remove CodeGenerator Add-in commands from menus
Remove SCM commands Add-in from menus
Close Microsoft Visual .Net or Visual Studio 2005 and re-launch it. The default configuration is reset.
|
|
The commands are temporarily removed. To get them back, close and then re-launch Visual Studio. |
[Top]
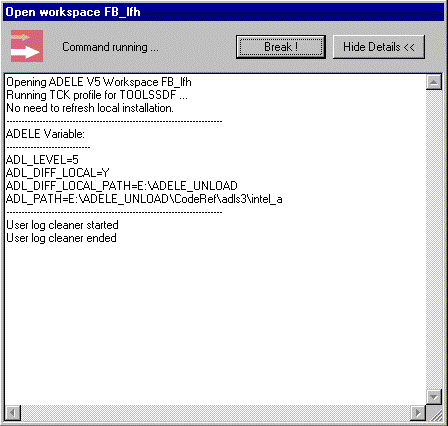
There are two kinds of CAA V5 commands that can be run:
 Show
   Details >>/Hide Details <<
mode of the window to browse or hide
the feedback of the command. Hide Details
mode. If the Output is being displayed, the Break
button switches to Close. Click the
Close button to close the window.
If the command fails, you always need to close the window manually.
|
|
For the C++ Interactive Dashboard, these commands outputs are redirected to the Output Tab with the CAA Tool name. |
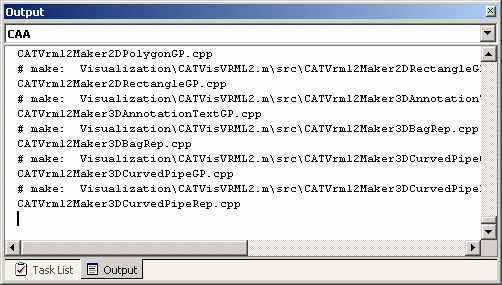 |
Traces are kept visible until a new command is run, allowing you to consult
these messages, especially when an informative command has been run, in the
example below we asked for the list of existing workspaces. The traces are also
saved in files in your workspace and can be retrieved using
Open Command Log... available in the
Tools menu. The lifetime of these files is
of approximately one day.
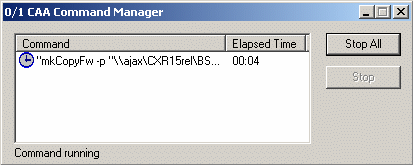 |
Asynchronous commands are piled in the CAA
Command Manager and executed sequentially. The
CAA
       Command Manager
window is
displayed whenever an asynchronous command is executing or waiting for
execution. In this window you can see commands that are done, running or
waiting.
When all commands have stopped, the
|
[Top]
|
|
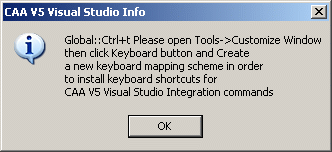
When first opening Visual Studio .NET,
the dialog box opposite is displayed. It is strongly recommended to create
the new keyboard mapping scheme. To do so, proceed as follows:
|
 |
This section explains most of the RADE commands, along with a step-by-step sample. This scenario shows you how to:
We consider here the case where you are starting from scratch. If you already have a workspace on your file drive, see "Customize Microsoft Visual Studio .NET" [1] to know how to migrate a CAAV5 File Tree to a format which can be handled by Visual Studio .NET.
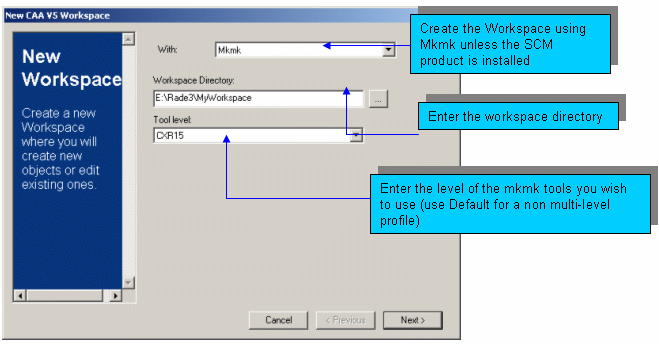
To create a workspace, proceed as follows:
|
 |
|
|
Note in the picture above, the Build On UNIX bar is not available. To find out more about the way to use the Setup tool to enable Build On Unix, see Building your software on UNIX. |
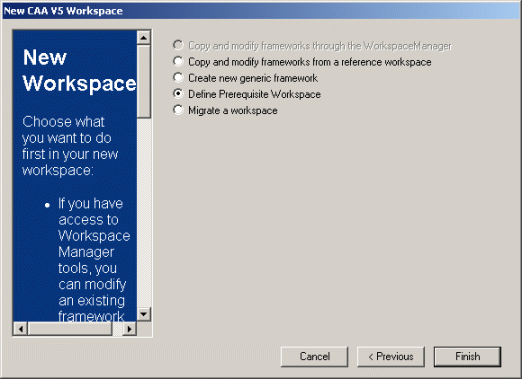
After creating the workspace, the following window is displayed.
Note that:
Select an option and click Finish. The corresponding window will be automatically displayed. |
 |
[Top]
We consider here the case where a project has already been set up. See Customize Microsoft Visual Studio .NET [1] to know how to migrate a CAA V5 File Tree to a format which can be handled by Microsoft Visual Studio .NET.
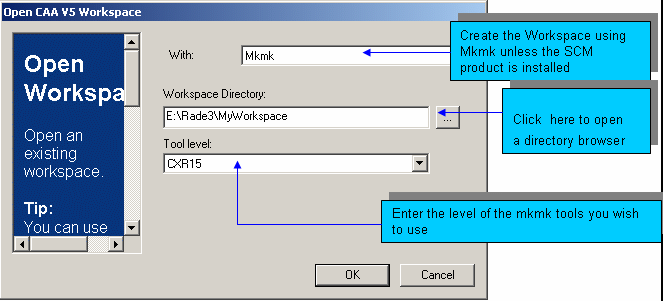
To open a workspace, proceed as follows:
|
 |
|
|
Note in the picture above, the Build On UNIX bar is not available. To find information on how to use the Setup tool to enable Build On Unix, refer to Building your software on UNIX. |
[Top]
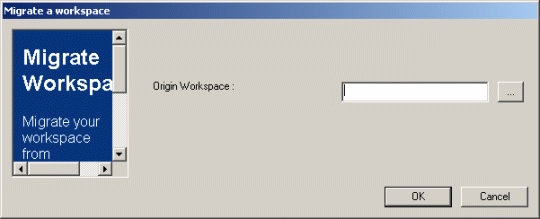
If you have developed code in a workspace on a CAA Release N level, and want to migrate this code to a new CAA Release N+x level, migrate your workspace. To do so, proceed as follows:
The new workspace will then be populated with the code from the origin workspace. You need to set your prerequisites to point to the new CAA code as explained in the section "Set up Prerequisites" and build your code as explained in "Build your workspace using mkmk". |
 |
[Top]
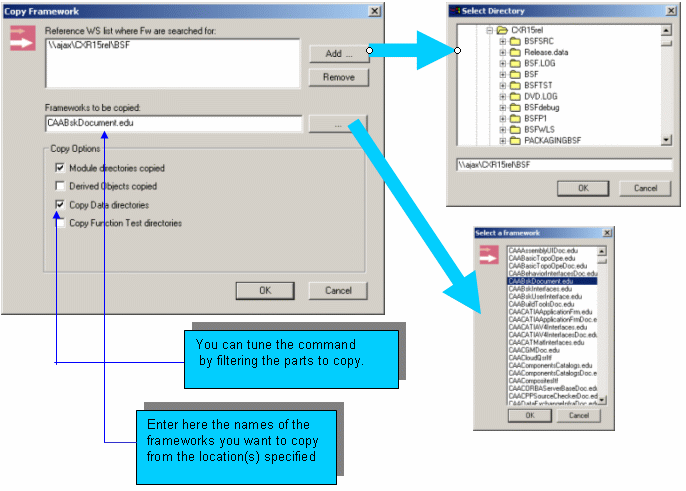
We now see how to copy a framework from a workspace to another: we're going to copy the framework entitled "CAABskDocument.edu" available in the official CAA V5 education frameworks and which have been downloaded under E:\install\CAA2 directory. To do so, proceed as follows:
CAAV5 Workspace menu,
select Copy Framework.... The Copy
Framework window is displayed.Add... to select the
workspace containing the framework that you want to copy.... to select the
name(s) of the framework(s) to copy. Note that you can indicate the parts of
the framework to copy: you can filter out the modules , the data directories,
the derived objects (results of a build in the origin workspace), test
objects (cf. Copy Function Test directory),
etc...|
|
When the origin directory is located on a Unix
machine, it is not visible from the current Windows workstation. In this
case the Add... buttons are
useless and you must enter the usual information to allow a remote copy
from the Unix machine. |
Once the copy is completed, the new framework(s) and module(s) are not directly managed by the dashboards: you must update their "description" files to make the new data appear. To do so, proceed as follows:
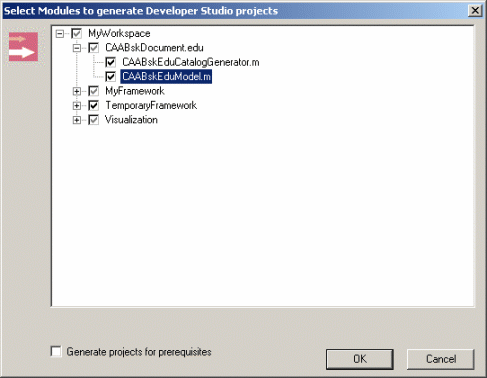 |
|
[Top]
The prerequisite frameworks/modules must be managed in a CAA V5 File Tree, for instance, the directory where data have been copied from a CAA V5 build-time CD-ROM can be considered as the root of a CAA V5 workspace and can be specified as the location of prerequisites needed by a new application.
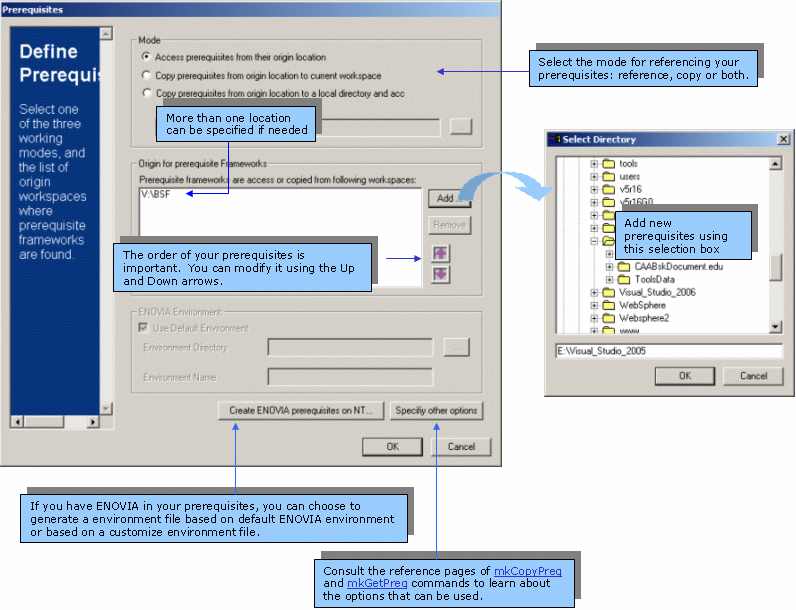
Setting up prerequisites consists in indicating the root directory(ies) of workspace(s) where the code builder (mkmk) will find the code necessary to build your objects. This action can be performed several times, the last setting replaces the previous ones. To define prerequisites, proceed as follows:
CAAV5 Workspace menu,
select Locate Prerequisite Workspaces....
The Prerequisites window is displayed.Mode field, select the
mode that will reference your prerequisites.|
|
|
Add to add new
prerequisites workspaces.OK when done.
[Top]
The first time you compile your program, use the mkmk builder which will not only compile your program but also generate information that will be used afterwards to accelerate compilations or to compile just one file.
If your program is based on components that are not present in your workspace (we call them pre-requisites), first set up your workspace by specifying the location of these components. Then you can run mkmk. To run mkmk, proceed as follows:
Build menu, select
mkmk. Update makefiles (-u) and
Debug mode (-g) if need be and
click OK.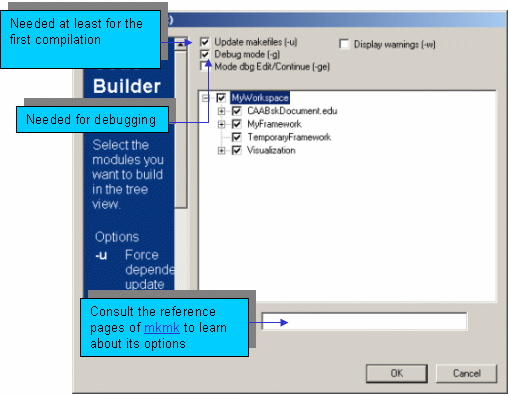
|
|
Once the project/module has been compiled, you
can then compile just one source or run a faster compilation of a module:
|
[Top]
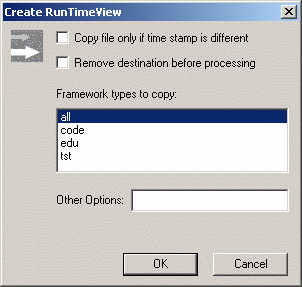
When you write a CAA V5 application, your application needs external resources such as dictionaries, message files, graphic resources, and so on. Those resources are delivered in data modules but scattered across many frameworks (either your frameworks or prerequisite frameworks), the first thing to do before running a program is to gather resources into a common directory that we call the Runtime View. To create the Runtime View, proceed as follows:
 |
Note that:
|
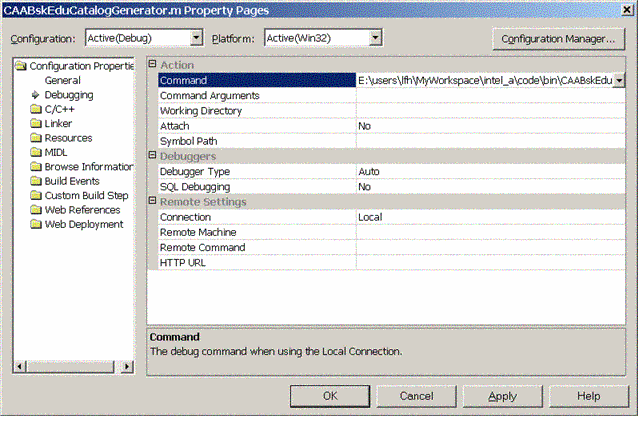
Once the CAABskDocument.edu framework is built and the Runtime View has been created, you can run your program CAABskEduCatalogGenerator.exe. Therefore, select the module CAABskEduCatalogGenerator.m as Active project. To do so, proceed as follows:
Launch the program. To do so, proceed as follows:
|
 |
[Top]
You can create you own tool. To do so, proceed as follows:
|
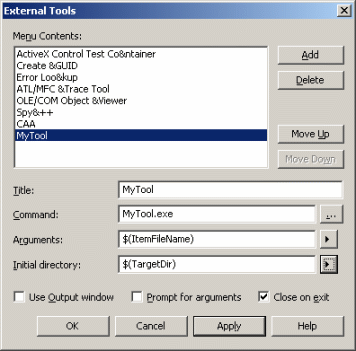 |
The new command is displayed in the Tools
menu. By default, after executing Open CAAV5
workspace..., the Visual Studio .NET environment is set with the
runtime environment of the workspace. This is done in order to execute and
debug CAA V5 programs with standard Visual Studio .NET commands. The problem is
that runtime environment in not compatible with buildtime commands. So if you
want to execute buildtime commands (mkmk, mkodt, mkCheckSource for example) in
your tool, swap to the buildtime .
To do this, execute %RADE_ToolsData%\vcenv.bat at the beginning
of your tool. Note that the RADE_ToolsData environment variable is
automatically created and set by Open CAAV5
workspace...
Example MyTool.sh:
@echo off
rem Display runtime environment by default
rem ======================================
set

rem Swap to buildtime environment
rem =============================
call %RADE_ToolsData%\vcenv.bat

rem Display buildtime environment and continue...
rem =============================================
set
...
[Top]
[Top]
| [1] | Customizing Microsoft Visual Studio .NET |
| [2] | Working with the RADE Dashboard & SCM |
| [3] | Code Generator Features |
| [4] | Workbench Commands Mapping |
| [5] | Installing the interactive RADE products |
| [Top] | |
| Version: 1 [Jan 2000] | Document created |
| Version: 2 [May 2003] | Document updated |
| Version: 3 [February 2005] | Document updated |
| [Top] | |
Copyright © 2005, Dassault Systèmes. All rights reserved.