RADE
|
Data Model Customizer for ENOVIA
|
Migrating an Existing Customization
Customizing ENOVIA
|
| Quick Reference |
Abstract
This article explains how to migrate a customized data structure created
through the RADE tools from an ENOVIA version N to a subsequent version
of ENOVIA. This is a necessary step that needs to be done after you have
applied the standard migration process provided with the new version of
ENOVIA.
|
Migrating an ENOVIA customization consists first in migrating the CAA workspace
defining this customization.
- From the
File menu,
select
New->Project.
- In the
New Project
window, select
UML Project and
click
Next.
- Enter the name of the project in the
Project name
field. Click
Next and
Finish.
- Select the new Project in the
Navigator
view.
- Select
Open as a DMC Project
fom the contextual menu.
- From the
DMC Project
menu, select Migrate the current Workspace.
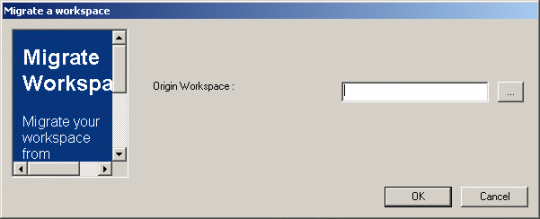
The Migrate a workspace window
displays.
|
- In the
Origin
			Workspace field
, enter or select the pathname
of the workspace to migrate.
- lang="fr">Click
OK lang="fr" to validate your selection. the new caa workspace is now available.
to validate your selection. The new CAA V5 Workspace is now available.
|
After migrating the workspace and the database using the shell
Upgrade5518_Enovia.sh
($INSTALLENOVIA/$OS/code/command directory), see below to
publish the migrated customization.
Publishing the Migrated
Customization
You are now to ready to publish the data structure to the ENOVIA database.
Note that this publication only affects the data created previously through RADE.
- In RSA/RSM, select
File->New->Project->UML Project.
Click Next>.
- In the
Project name field, enter
the name of the workspace you migrated in
Migrate a Workspace to a new CAA version release. Click
Next>
and Finish.
- In the
Navigator view, right-click
your UML Project and select Open as a DMC project.
The Open a DMC Project window opens.
- If need be, enter the tool level and click
Next>.
- Click
Close in the
Initializing Tools window.
- Select
Access prerequisites from their origin
	location
and click Add
to select your prerequisites. Click Finish.
Click Close in the
Installing Prereqs window.
- In the
Navigator
view, double-click the metadata located in the Framework_to_migrate\CNext\Code\dictionary
directory.
 |
You must perform the above step for each framework
and each metadata. |
- Select
DMC Project->Import VPM Dictionary file.
To find out more, see
Importing Metadata.
- Optionnal: You can add a class to an existing customization.
To find out more, see
Adding a new Object Modeler to an Existing Customization.
- Optionnal: You can add an attribute to an existing object.
To find out more, see
Adding an Attribute to an Existing Object.
You can now create your customizations. After performing your customizations,
publish the migrated customization. To know more about the possible customizations,
see Creating a New Customization Application.
- Check if the settings are correctly valuated
and publish
the dictionary file. To do so, select
DMC
	Project->Publish VPM Dictionary file in Database
.
[Top]
References
History
| Version: 1 [Sep 2002] |
Document created |
| Version: 2 [March 2006] |
Document updated |
| Version: 3 [January
2007] |
Document updated |
| Version: 4 [July
2007] |
Document updated |
| [Top] |
Copyright © 1994-2007, Dassault Systèmes. All rights
reserved.

