 |
When you run a simulation using NC code, you
can choose to see Workpiece Origin or Cutter Compensation data.
- The Workpiece Origin Management panel controls G53, G54, G55, G56,
G57, G58, G59 NC code data.
- The Cutter Compensation panel controls G41 and G42 (radial
compensation) and G43 (2- and 3-axis length compensation) NC codes.
|
 |
Before you can run this procedure, take the
following steps:
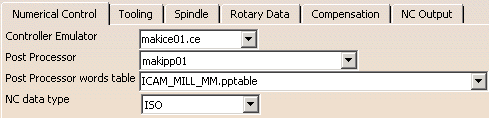
-
On the Tools > Options > Machining > Output
tab,
select a Post Processor type for your NC code (e.g.,
ICAM®).
-
On the Tools > Options > Machining > Output
tab,
in the Default File Locations area, specify CATNCCode as the
file extension, and select output locations.
-
Assign an NC machine to the part operation.
-
In the machine editor dialog box for the NC machine
(accessible in NC Machine Tool Simulation by right-clicking the machine
on the PPR tree, and selecting machine object > Edit), set
the Controller Emulator, Post Processor, and
Post Processor words table appropriate for your machine and the
Post Processor you selected in Step 1.
 |
 |
The contents of the lists available on the machine editor
dialog box depend on the options selected in Tools > Options >
Machining > Output. |
|
 |
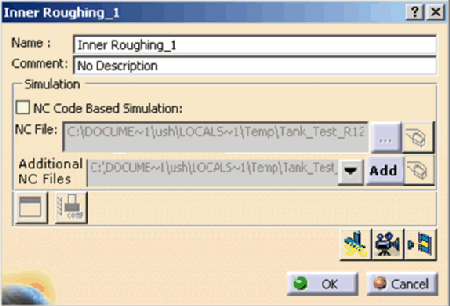
-
Double-click on the manufacturing program in the PPR
tree.
| The program dialog box appears (the name of the dialog box is
the name of the manufacturing program, e.g., 001). |
 |
-
Click Display Origin Management Panel
 . .
| The Workpiece origin management dialog box appears. |
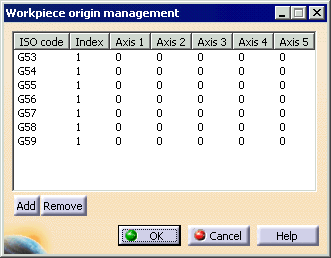 |
| The image above shows the panel in its initial state. |
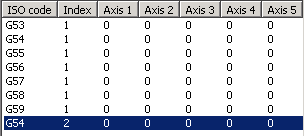
-
Click line G54, then click the Add
button.
| A second G54 line appears; its index value is set at 2. |
 |
-
Double-click on specific entries in the panel; the
entries become modifiable.
- The number of axes available depends on the machine involved;
the panel above show a 5-axis machine.
- By default, the value associated to each axis is 0; you
modify the value.
- The value is in mm for linear axes and in degrees for rotary
axes.
- This value can be negative or positive, per the convention
defined on the machine axis.
|
-
Click OK.
-
Click Display cutter compensation panel
 . .
| The Cutter compensation management for simulation dialog box
appears. |
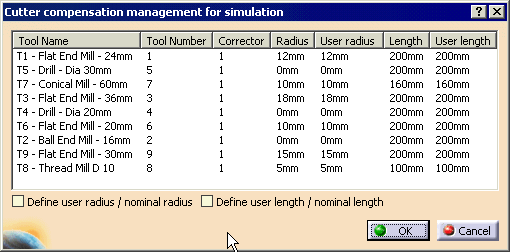 |
| You cannot modify the Tool Name, Tool Number,
and Corrector fields. Initially, the User
radius or User length values (i.e., the relative
values) are set equal to the absolute Radius or
Length values. |
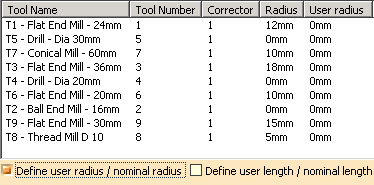
-
Select the Define user radius/nominal radius check
box.
| The values in the User radius column are set to 0.
|
 |
-
Double-click on the User radius values you
want to modify.
|
|
You can repeat Steps 6 and 7 with the Define user
length/nominal length check box. |
-
Click OK, and run
the simulation or create a video
replay.
|