-
Go to the DMU Navigator workbench and define the Scene with the adequate orientation and with the instances properly positioned. For more information, refer to the DMU Navigator User's Guide.
-
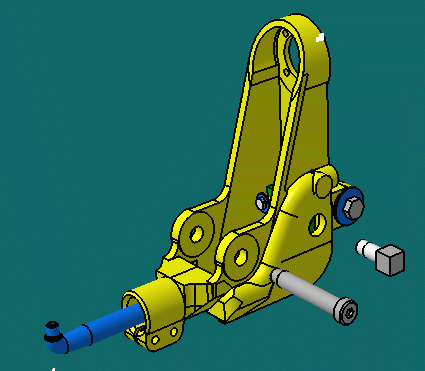
Explode the view as shown here:

-
In the Drafting workbench, click Isometric View
") in the Views toolbar (Projections sub-toolbar).
in the Views toolbar (Projections sub-toolbar).
-
Select the scene (Scene.1) in the specification tree or in the geometry area, and then select a plane on the product.
-
Click in the drawing to position the resulting exploded view.
Non exploded product: Exploded product:

- You can insert Bill of Material or Advanced Bill of Material information into the active view.
- Remember that you must select the scene before creating a view, otherwise you will create a view of the whole assembly.
![]()