Choose a task:
Generating an Advanced Bill of Material

-
In the sheet, select Edit > Sheet Background.
-
Click Advanced Bill of Material
 in the Drawing toolbar (Bill Of Material
sub-toolbar).
You can also create the bill of material in working view, select Insert > Generation > Bill Of Material > Advanced Bill of Material. The Bill of Material Creation dialog box is displayed.
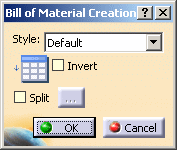
The following inputs can be given in this dialog box: - Style : The style to be used while creating the Bill of Material. The last used Bill of Material style is displayed as default option when creating a Bill of Material.
- Invert : Select this option if you want the table to be read from bottom to top (i.e. column headers at the bottom and items numbered from bottom to top).
- Split : Select this option to split the table into several tables. For more information on splitting tables, see Creating/Modifying a table.
-
Select the Invert check box.
-
Click OK.
-
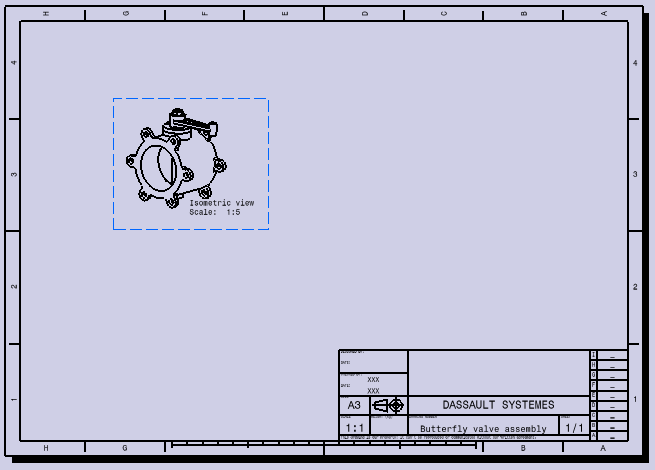
Select the Isometric view from the specification tree.
-
Click in the drawing to indicate where you want to position the Advanced Bill of Material.
The Bill of Material is generated as the selected Bill of Material style.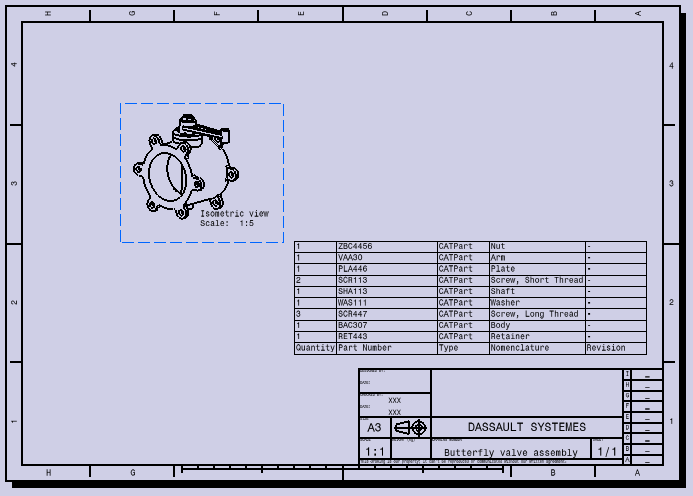

The styles of Advanced Bill of Material are defined by the administrator in the annotation styles (Tools > Standards > [standard name] > Styles > Bill of Material). The Bill of Material has the following default properties:
- Quantity
- Part Number
- Type
- Nomenclature
- Revision

Modifying an Advanced Bill of Material

Editing Advanced Bill of Material Properties

-
Right-click the Bill of Material and select Properties.
The Properties dialog box is displayed. The properties of Bill of Material can be modified in the BOM Format and Reported Properties tab. - Select the
BOM Format
tab.
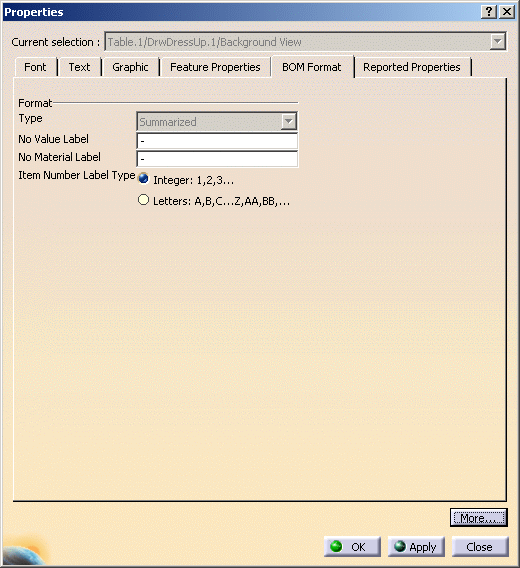
You can edit the following options:
- Type: This option is grayed out.
The setting is done by administrator in Tools > Standards >
Drafting > [standard name] > Styles
> Bill of Material.
The Bill of Material with Top Level setting is as seen:
- No Value Label: Set a label when no value is set in the appropriate property field. The default value is -.
- No Material Label: Set a label,
when the Material property is set in
the Bill of Material and no information
is set for the Material property. The
default value is -.
This setting is also used in Weight property, if the related Part does not have any material defined for it. - Item Number Label Type: For each
line of the Bill of Material, a specific item
number is assigned. The item number is used in the
balloons for numbering. The numbering can be of
two types:
- Integer: 1,2,3...: Select this option if you want the item numbering to be integer. This is the default option.
- Letters A,B,C...Z,AA,BB...: Select this option if you want the item numbering to be alphabetically.
- Type: This option is grayed out.
The setting is done by administrator in Tools > Standards >
Drafting > [standard name] > Styles
> Bill of Material.
- Select the
Reported Properties
tab.
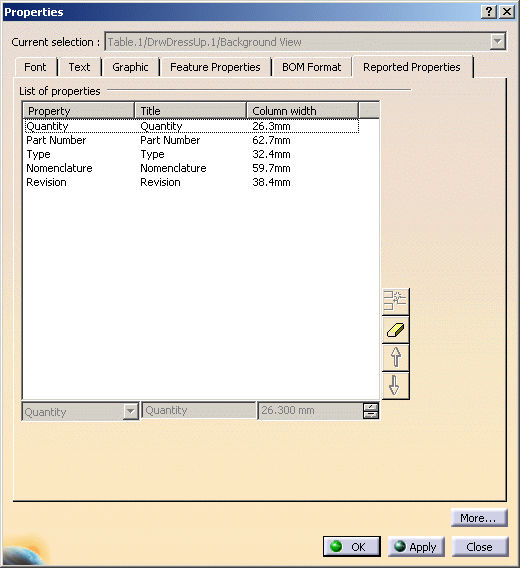
You can add new properties to the Bill of Material. For each property, a new column is created. Apart from the default five properties the following properties can be added:
- Item Number
- Part Number
- Nomenclature
- Material
- Weight
- Quantity
- Description
- Revision
- Definition
- Source
- Type

- Reported Properties are not supported in case of heterogeneous selection of Bill of Material who have the reported properties different either in content of term of order.
- Reported properties are supported in case the selected Bill of Materials have same reported properties and order even if their titles and column widths are different.
The list of displayed properties in the Bill of Material can be edited using:
-
New
 :
adds a new property as a new line. This
button is activated only when a line is
selected. Click this button and a new line is
added at the end of the property list and is
initialized from the previously selected
property.
The newly created property can be customized as any existing property using the following:- Property: Select the
property you want to set from the
Property drop-down list.
You can select the same property as many times as you need. - Title: You can modify the title of the property.
- Column width: You can set the column width using the spinner. The width value is set using the Drafting standard unit (mm/m/inch as specified in the Tools > Options > Mechanical Design > Drafting, General tab, Paper Unit field).
- Property: Select the
property you want to set from the
Property drop-down list.
-
Delete
 :
removes one or more properties. This button is
activated once a line is selected. Select one or
more properties and click this button.
 -
Move up
 :
moves the selected property up. This button
is activated only when a line is selected.
 -
Move down
 :
moves the selected property down. This
button is activated only when a line is
selected.

- The administrator and you are allowed to set several times the same value. For example, Material can be set twice. In that case, two columns will be created with the same value.
- For each property, a default name is set. The administrator and you can overload the default name in the editor field. If the title is not set, then the default name will be used.
Add a new property Item No.. Change the title to Index. Change the column width to 30.
- Add more properties Material and Weight.
- Reorder the
properties as shown using the up and down arrows and click OK.
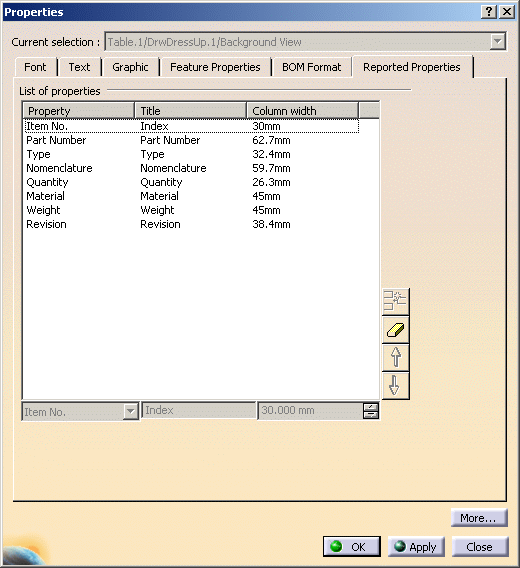
The Bill of Material is updated.

- Select Edit > Working Views.
- Click
Generate Balloons
 to generate balloons in the active view as numbered in the
Bill of Material.
Balloons are generated in active view using the following commands:- Balloon

- Generate Balloons

The numbering is done as seen:
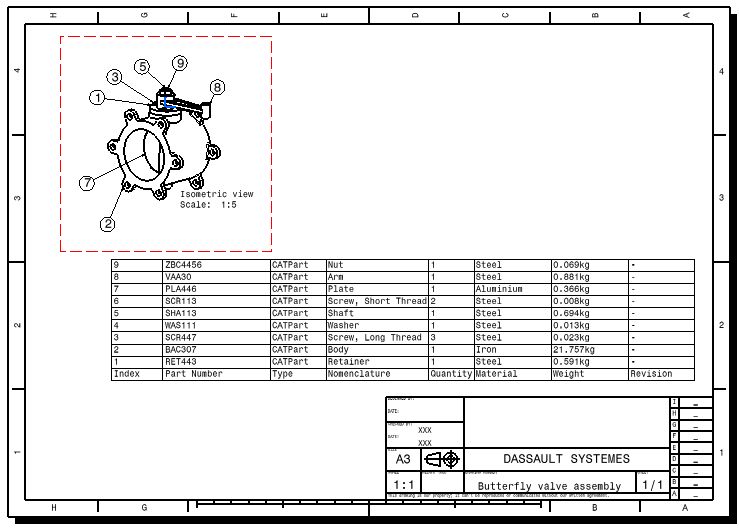
- Balloon
The number displayed in the balloons depends on the following:
- The number is the same as the one displayed in the Advanced Bill of Material for the component (if any).
- The number is defined by Generate Numbering command and is displayed in the Number property of the instance (if any).
- If both of the above cases are not applicable then an index automatically increments the number (from 1 to n).
Editing an Advanced Bill of Material

- If you have inserted the Bill of Material in Sheet background, then you can edit it in the Sheet background only.
- If you have inserted the Bill of Material in Working View, then you can edit it in the Working view only.
-
Right-click the Bill of Material and select Table.X object > Edit BOM.
The Bill of Material Edition dialog box is displayed.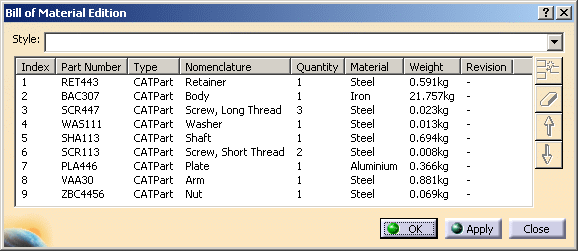
-
 adds a new
blank line. This
button is activated only when a line is
selected. Click this button and a new line is
added above the selected line.
The blank line is always created above the selected line. -
 removes any blank line that is added. This
button is activated only when you select a blank line.
 -
 moves the selected
line up. This button
is activated only when a line is selected.
 -
 moves the selected
line down. This
button is activated only when a line is
selected.
-
- Select the row
you want to reorder and click the up or down arrow depending on your
need.
In this case select Washer and click the up arrow till it is reordered to first position. You can see that the entire line along with all the properties is reordered. You can see that the item number is also reordered.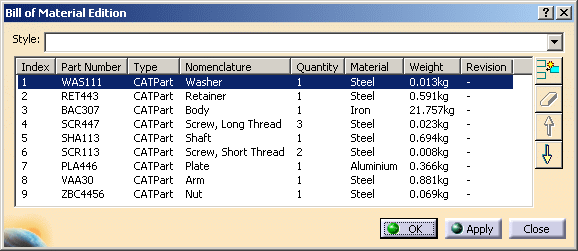

- Select the row
above which you want to create a blank line and click
 icon .
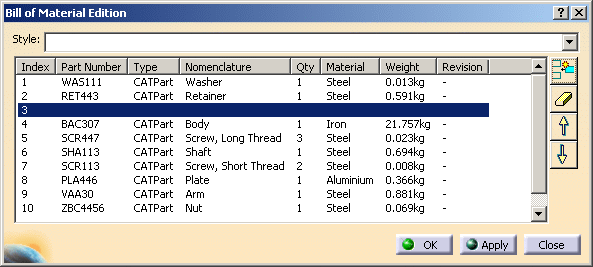
- Click OK.

- Again right-click the Bill of Material and select Table.X object > Edit BOM. The Bill of Material Edition dialog box is displayed.
- Select the
blank row to delete and click the
 icon.
icon.
More about Bill of Material

- Components deactivated or in No Show Space in Product are displayed in the Bill of Material.
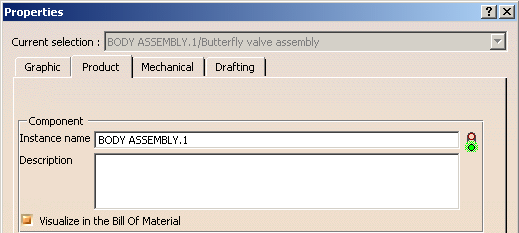
- To hide
a component in the Bill of Material, clear the
Visualize in the Bill of Material
check box in the Properties
dialog box of the product in the Product Structure workbench.
- Only material defined at Part level will be displayed in the Bill of Material. If material is defined at Part instance level or within a body of the Part, the result will be same as if there was no material defined (see No Material Label property).
- Weight property is supported for Part and will not be computed for assemblies. The weight is computed only if material has been assigned to the Part following the previous conditions.
- The unit for weight is displayed only if Display Units check box is selected in Table Properties contextual menu, Text tab.
- The unit and decimal system for weight are set in the Tools > Options > General > Parameters and Measure, Units tab.
- Item numbers are not reassigned. If a component is deleted, then the associated row data is emptied except the Item number.
- If a new component is added to the assembly, when updating the Bill of Material, this component is assigned a new Item Number resulting from increasing the last previously assigned number at the end of the Bill of Material. If the last line is a blank line, then the new component is added above the blank line.
- If a product or a part displayed in the Bill of Material is replaced by another one in the assembly, its item number is assigned to the new one (if this one was not previously referenced in the bill of material).
- It is possible to isolate the Bill of Material using the contextual menu Table > Isolate Table. In this case, other tables representing a part of the Bill of Material are also isolated.
- The Bill of Material will not be rerouted if you replace its source product (the product from which it was generated). In this case, you need to generate a new Bill of Material.
- You can modify the cell value by editing the cell (generic table edition mode) by adding text to the cell, or removing the attribute link to overload the value (useful to overload quantities for example). Notice that if a value is overridden, the cell will no more be updated to reflect later modifications of assembly.
- You can manually add columns. The modifications made in the manually added columns are kept after update.
-
As other annotations (such as texts with attribute links), the Bill of Material update status is not taken into account in the drawing update status. So even if the Bill of Material is not up-to-date, the Update icon is not activated. Use force update command to update the Bill of Material.
-
Only a manually added line or an empty line due to instance deletion in 3D can be removed while editing the Bill of Material.
-
Merge functionality is not available on cells that display item properties (including reserved lines), as well as column titles. Merging is available on cell and columns manually added.
-
As any other table, a bill of material can be split into many tables. The split tables of Bill of Material are retained after update.
-
Deleting a table of the Bill of Material makes the other tables of the same Bill of Material isolated (it means that modifications done on the assembly are no more reflected in the tables).