Creating a Bundle With New Route
|
|
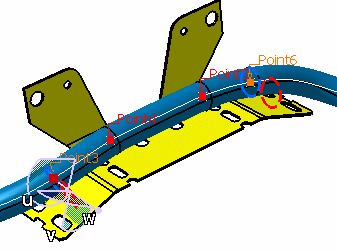
This task shows you how to "follow" a flexible, meaning route parallel to part of an existing flexible. When you route a flexible as explained below you are creating a 'bundle'. A bundle is a type object that you can view in the specifications tree. It constrains one or more tubes to a master tube, to keep the tubes together. | |
|
|
You should be
familiar with concepts and steps described in
Routing Flexibles. In the example below the user wants to create a
bundle by adding a new route
between the two unconnected components, and wants to use the existing
tube as a master which the new tube will follow. You should have placed points on the routable because these are used to indicate the portion you want to parallel.
A bundle can also be created with two or more existing routes - see Creating a Bundle With Existing Routes for more information. |
|
|
|
1. | Click the Flexible Tube Routing button
|
| 2. | Select the Center to Center option and make selections in
the other fields.
|
|
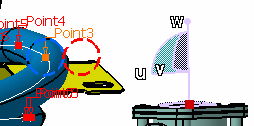
| 3. | The compass displays at the start point, and two circles display at the
start and end points. The circles represent the location where the new
route will parallel the master route. You can use the compass to
manipulate the location, as shown below.
|
|
| 4. | Click the Reverse Direction button to flip the location of the new
route to the opposite side of the master route.
|
|
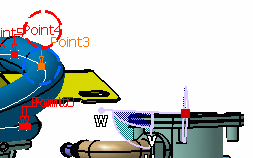
| 5. | Click the Tangent to Surface button if you want the new
route to be parallel to the compass base plane. In the two images below
the red circle shows how changing the compass base plane changes the location of the new
route.
|
|
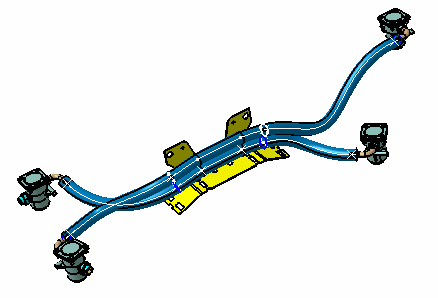
| 6. | Click OK in the Follow Tube dialog box to return to the Flexible
Routing dialog box. A preview of your route displays. Select the
connector on the second component to complete your route. Click OK to
exit the Flexible Routing command.
If there is a clash at the intersection of two tubes then you may need to place a point on the master route to realign the parallel routing. |
|
|
|
|
|


![]()