Routing Flexibles with an Offset
|
|
This task explains how you can route a flexible using one of two offset features. | |
|
|
You can use either
the Bottom Offset
You should be familiar with the settings and options explained in Routing a Flexible. |
|
|
|
1. | With your document open, bring up
the Flexible Routing dialog box. Select other
options as needed, then click the Bottom Offset or
Center Offset button and enter a value in the
Offset field. Click on the surface you want to route on and click
Apply or double-click to end routing. The flexible will be
created.
|
|
|
The offset is measured at the points that you click. If you have too much slack, or length, then the flexible may go through the surface. If this happens then you need to adjust the slack or length. | |
| 2. | To use the reference plane to
offset from, place a reference plane on a surface, such as an edge.
Bring up the Flexible Routing dialog box, then
click the Bottom Offset or Center
Offset button. If you do not want any bottom or center offset then enter 0. Click
the Offset From a Reference Plane
button and enter a value in the field. This is the
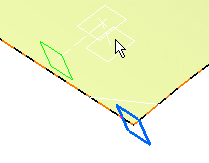
distanced between the reference plane and the flexible. In the image
below you can see that you will only be able to route the flexible at
the offset distance.
Route your flexible, and double-click or click Apply to end.
|
|
| 3. | Click OK to close the Flexible Routing dialog box. | |
![]()


