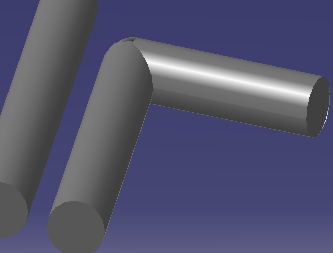
The images below show routing using a run, the procedure is the same with path reservations.


![]()
|
|
This task shows you how to route parallel to, or at an offset of, a routable. See also Route at an Offset of a Routable and Position Segment Relative to Plane. | |
|
|
This function is used when you have an existing routable and want to route parallel to it, or at a certain clearance from it. It is sometimes known as edgeline routing. You can also place an offset plane on a surface and use it as a reference point. | |
|
|
1. | Display the path reservation you want to
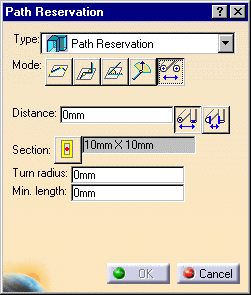
route parallel to and click the Path Reservation button
|
| 2. | Click the Edgeline button
|
|
|
|
If you click the Offset button the distance between the two path reservations will be measured from centerline to centerline. If you click the Clearance button the distance between the two nearest edges will be measured. If there is a part, the distance will be measured from the part. If there is no part the distance will be measured from the path reservation. | |
| 3. | Enter the distance between the two path reservations. If you enter 0 and click the clearance button, the two path reservations will touch at the edges. | |
| 4. | Click at the starting point. The compass will display at that point. | |
| 5. | Move the compass so that the Z axis points in the direction that you want to route, which should be in the direction of the path reservation that you want to parallel. You can do this by moving it manually, or by clicking the second mouse button once and then toggling the shift key. | |
| 6. | Once the direction is selected, route toward the path
reservation you want to parallel. When the centerline of the target run is
highlighted you can press the Shift key to toggle between various
"solutions," or various sides. In the images below there are only two
solutions and you can route on two sides of the target run.
The images below show routing using a run, the procedure is the same with path reservations. |
|
| 7. | Select the target routable after you have decided which side you are routing on. | |
| 8. | Begin routing and double click to end. The finished
routable is shown below.
|
|
|
|
You can place an offset plane on a surface and use it as a reference to route parallel to, or to keep a certain clearance from. After placing the offset plane use the procedure described above. | |
|
|
||