 |
This task shows you how to probe using multi-points.
To create the operation you define:
Only the geometry is obligatory, all of the other parameters have a
default value. More information is available in Probing Operations Parameters. |
 |
-
Click
Multi-Points Probing
 . .
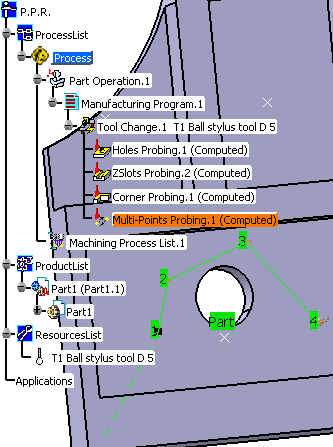
A Multi-Points Probing entity has been added to the
program.
The dialog box opens at the geometry page
 . .
This page includes a sensitive icon to help you specify the geometry to be
machined.
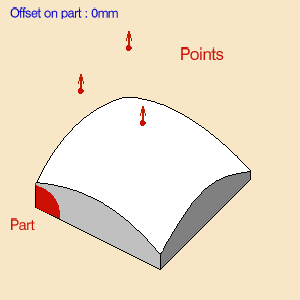
Click the red area in the
sensitive icon select the part in the viewer.
Then double-click anywhere in the viewer to confirm your selection and
redisplay the dialog box.
Similarly, click Points in the sensitive icon and and pick the
required locations on a surface. The points are created on the surface
using the coordinates of the pointer.
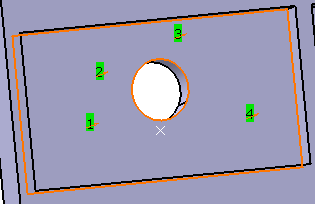
Those points are listed under the sensitive icon. You can edit them,
remove them or reorder them.

Note that:
- the probing direction is the normal to face at the points when
you pick and create them on the fly,
- it is the tool axis direction when you select existing points.
|
-
Click Tool Path Replay
 to compute the probing tool path.
A progress indicator is displayed.
You can cancel the computation at any moment before 100%
completion.
Click OK in the Tool Path Replay dialog box, and
again in the main dialog box.
The probing tool path is created.
Note that you can add your
own probing
parameters,
and create your
own tool bars with the probing operations you have defined.
|