This task shows you how to generate a 2D Display result after a dynamic response computation (harmonic or transient).
-
The computation of the solution is automatically launched when you use this functionality.
The computation process may be long. -
Results generated from a dynamic response solution with restraint excitation (using the Generate 2D Display contextual menu) are displayed in a relative axis system. That means that observed displacements correspond to displacements resulting from the elastic strain.
On the contrary, images generated from a dynamic response solution with restraint excitation (using the Generate Image contextual menu) are displayed in the absolute axis system. That means that observed displacements are the sum of rigid body displacements resulting from the excitation and displacements resulting from the elastic strain.
-
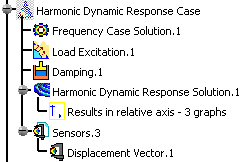
Right-click the Harmonic Dynamic Response Solution.1 object and select Generate 2D Display
 .
.The New Function Display dialog box appears.

The content of this dialog box depends on the excitation set you defined.
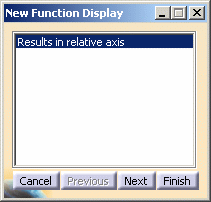
If you work on a dynamic response case (harmonic or transient) defined with a Restraint Excitation set, the New Function Display dialog box appears as shown below: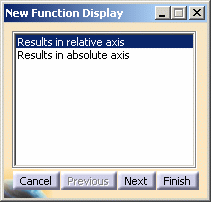
- Results in relative axis: lets you visualize
displacements resulting only from the elastic strain. These
displacements are expressed in the global axis system.
Even if you selected a User axis system in the restraint excitation definition, the displacement graphs generated with the Results in relative axis option will be expressed in the global axis system.
- Results in absolute axis: lets you visualize results in an absolute axis system.
- Cancel: lets you cancel the 2D Display generation.
- Previous: this button is not available at this step.
- Next: lets you access the next step of the 2D Display generation.
- Finish: lets you finish the 2D Display generation.
If you click this button at this step, you will create only one graph.
- Results in relative axis: lets you visualize
displacements resulting only from the elastic strain. These
displacements are expressed in the global axis system.
-
Click Next in the New Function display dialog box.
The dialog box appears as shown below:
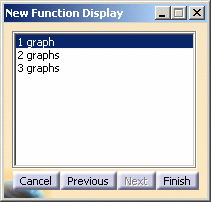
- 1 graph: lets you generate a 2D Display document containing only one graph.
- 2 graphs: lets you generate a 2D Display document containing two graphs.
- 3 graphs: lets you generate a 2D Display document containing only three graphs.
- Cancel: lets you cancel the 2D Display generation.
- Previous: lets you access the previous step.
- Next: this button is not available at this step.
- Finish: lets you finish the 2D Display generation.
-
Select 3 graphs and click Finish in the New Function Display dialog box.
-
Select a node on the mesh visualization in the .CATAnalysis document.

-
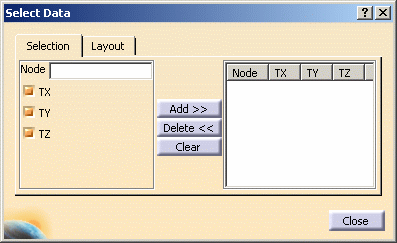
Select the degree of freedom (TX and/or TY and/or TZ).
In this particular example, deactivate the TY and TZ options.
-
Click the Add>> button.
The Select Data dialog box is automatically updated.
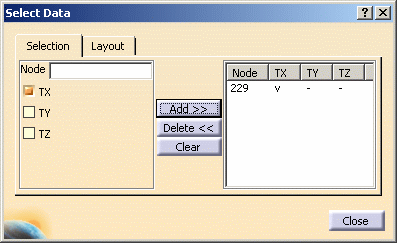
The three curves are automatically displayed in the 2D Display document.
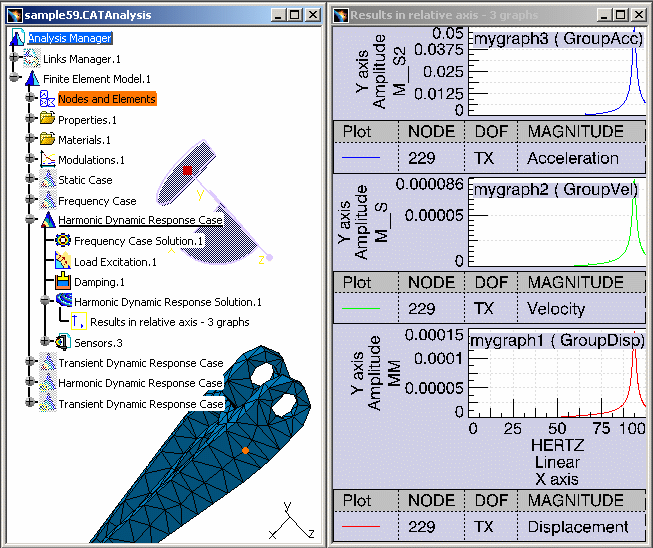
In this particular example, the first graph gives you the displacement results, the second one gives you the velocity results and the third one gives you the acceleration results.
-
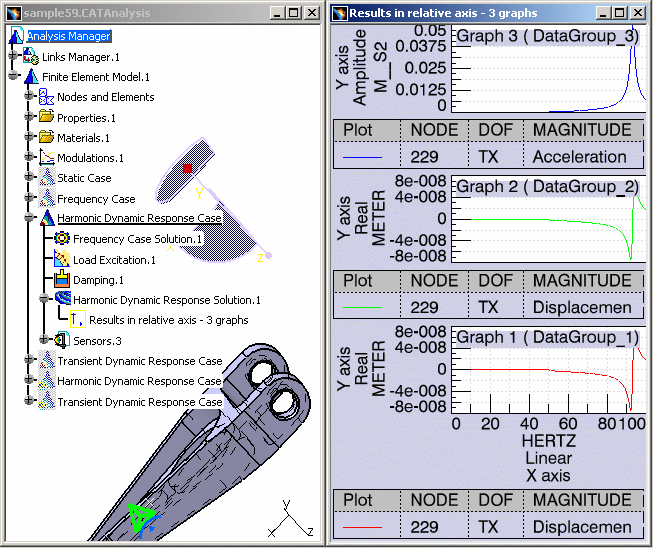
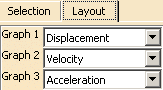
Select the Layout tab in the Select Data dialog box and select Displacement as output type for Graph 2.
The legend of the second graph is updated.
-
Click Close in the Select Data dialog box.
-
Change the format of the Y axis in the first graph and second graph.
To do this:
-
Double-click the Y axis of the first graph to edit it.
-
Select Real in the Format tab of the Y Axis dialog box.
-
Click OK.
-
Double-click the Y axis of the second graph to edit it.
-
Select Real in the Format tab of the Y Axis dialog box.
-
Click OK.
The 2D Display document is updated:
-
-
You can close the 2D Display window.
You can edit several graphic parameters.
For more details, refer to Editing 2D Display
Parameters.
![]()