Decimation is a command reducing the triangle count of a mesh for a
quicker execution of commands.
It also reduces the memory requirements for the model.
Many large meshes can be represented accurately with less triangles.
Decimation can be performed on the entire region or a selected region of the mesh.
You should use the Mesh Cleaner.
-
Click Decimate
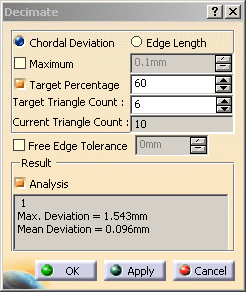
 and select a mesh. The dialog box is displayed:

-
Select the type of decimation you want to apply:
-
by
Chordal Deviation if you want to preserve the shape of
your model,
even in areas with a high curvature, -
by Edge
Length if you want to remove triangles with tiny edges and
obtain
a more uniform mesh.
However this may result in a loss of accuracy in areas with a high curvature.
-
by
Chordal Deviation if you want to preserve the shape of
your model,
-
Then, decide how you want the decimation to stop:
-
For a decimation by Chordal Deviation,
you can select the Maximum
check box and type a value.
It is the chordal deviation that should not be exceeded during decimation.
Decimation stops when the chordal deviation limit has been reached. -
For a decimation by Edge Length,
you can select the Minimum check box and type a value.
The command stops when further decimation could collapse edges of length
greater than the value typed. -
For both types of decimation,
select the Target Percentage check box f you want to obtain a given final number or percentage of triangles.
Type either the percentage value or the Target Triangle Count.
Those fields are linked to each other and updated simultaneously.
Current Triangle Count indicates the current number of triangles,
either of the original model when you type the action,
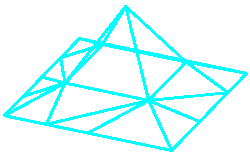
or of the result model when you have clicked Apply.Decimation with a Chordal Deviation at 70%:

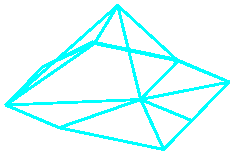
Decimation by Edge Length set at 70%: 
-
For a decimation by Chordal Deviation,
you can select the Maximum
check box and type a value.
-
You may need to control the decimation of free edges, when a rectangular shape sees its corners
cut off after decimation.
You can avoid this by checking the Free Edge Tolerance check box.
This activates the maximum allowable deviation that can occur for vertices on the boundary.
The resulting decimated boundary will not be at a distance greater than this parameter from
the original boundary. -
The chordal deviation that can be used as a stopping criterion is an approximation of the chordal
deviation between the original mesh prior to decimation and the decimated mesh.
Therefore it may be useful to know the maximum distance and the mean distance between
the original mesh and the result mesh at the end of the command.To do so, select the Analysis check box before clicking Apply.
At the end of the decimation, the maximum and the mean deviation will be reported as shown below.
Unlike the value typed in the Maximum field, they are the true deviations between the original mesh
and the result mesh.

- However, Analysis may be time consuming, especially
for large models.
We recommend that you turn it off when you do not need it. - The meshes can be decimated in several steps (click Apply=
one step).
The deviations displayed are those between the original model and the last result
(not those between the previous and the current results).
For this reason, the deviations will be increasing in value after each Apply. - Any selection change resets the original model for the analysis.
- Undo is not taken into account by the Analysis.
- However, Analysis may be time consuming, especially
for large models.
-
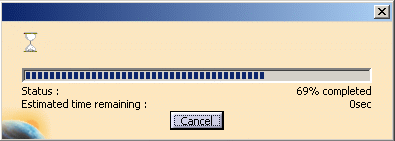
Click Apply, a progress bar is displayed. A Cancel button is available to stop the decimation.

-
Click OK to confirm the decimation once you are satisfied with the result.
![]()