This section explains how to create a surfacic flange on a web, or an existing surfacic flange.
Understanding the surfacic flange
When creating a surfacic flange, the bend is propagated along the whole base feature (with a continuity in tangency).
In certain cases this propagation prevents the surfacic flange from being relimited: this happens when the selected edge allows propagation of the bend.
Open the SurfacicFlange1.CATPart document.
-
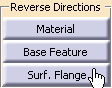
Click Surfacic Flange
 .
.The Surfacic Flange definition dialog box is displayed. 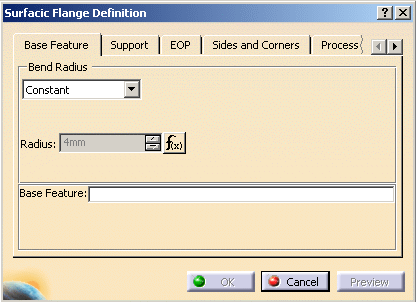
Base Feature
In the Base Feature tab, the Bend Radius is of Constant type. It is set to the default bend radius of the part. -
You can modify the fillet Radius value by changing the driving equation. To do so, click
 .
.
The Formula Editor dialog box opens and you can then modify the dictionary and the parameters.Or you may need to deactivate the formula using the contextual menu on the field and choosing Formula > Deactivate before editing the value. -
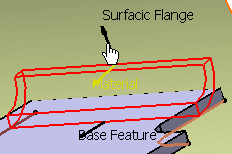
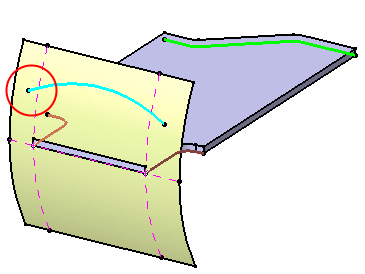
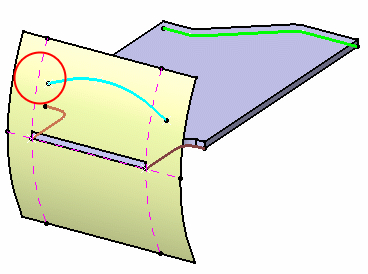
Choose the web as the Base Feature.
Once you chose the base feature, the Support tab automatically displays. Support
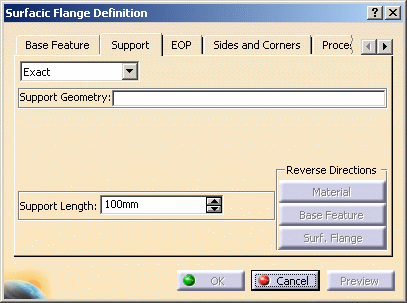
-
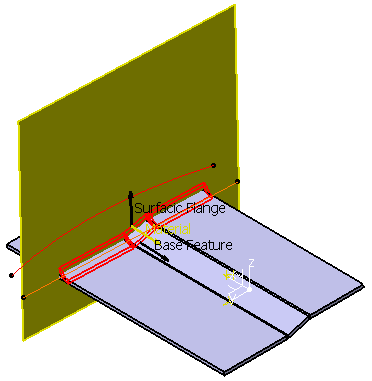
In the Support tab, choose the surfacic flange's geometrical support. It can either be a surface, a plane or a curve.
A preview of the surfacic flange is displayed. 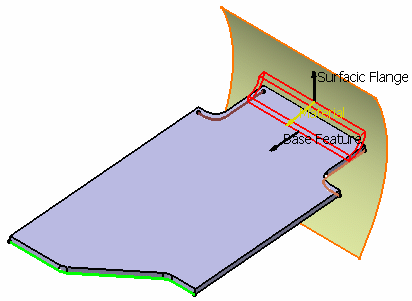

- In case the preview of the surfacic flange is not displayed, you should not be able to create it.
- Remember that the preview helps you build the surfacic flange but that the computation is only partial. For instance, it does not include relimitations of a surfacic flange.

Make sure the support is big enough to be able to later define an EOP with a length from OML. Three types of support are available: - Exact: the selected support is to be used for the creation of the surfacic flange.
- Approximation: the support surface is approximated using
a ruled surface. This ruled surface is defined from two curves:
- the OML (in light blue), computed at the intersection between the support surface and the web plane.
-
a curve parallel to the OML (in pink), computed at a distance equal to the approximation length
This mode enables you to compute the maximum deviation between the support geometry and the approximated surface.

-
Angle: the support of the surfacic flange can also be defined by a line, a curve, an angle or the edge of a base feature. The angle is constant and you can change its value using the spinners.

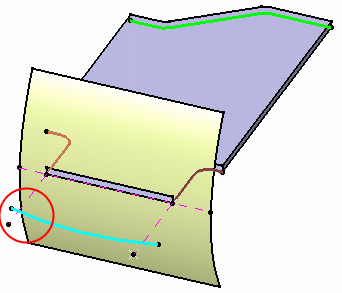
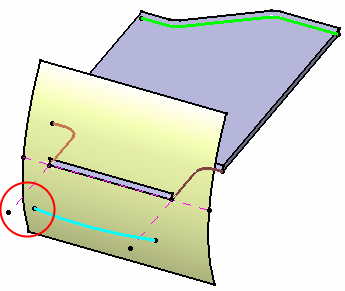
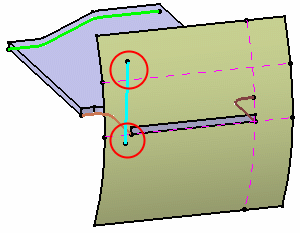
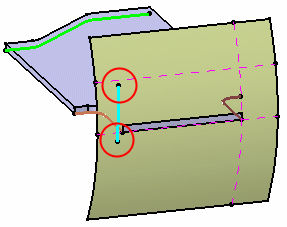
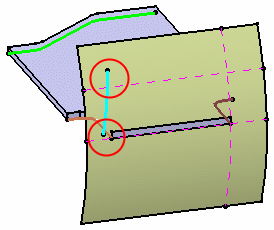
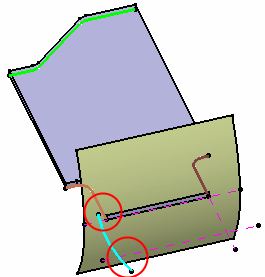
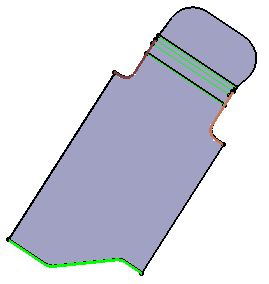
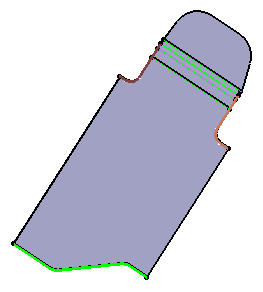
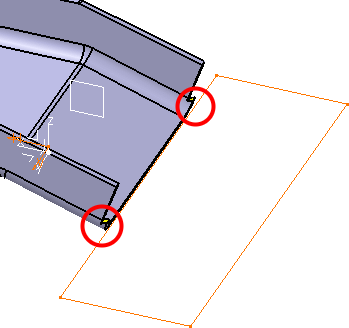
You cannot build a surfacic flange if you select only a part of the support's edge since relimitations are not computed. For instance, in the example below, the surfacic flange cannot be build, since it is not possible to select the whole edge of the web.
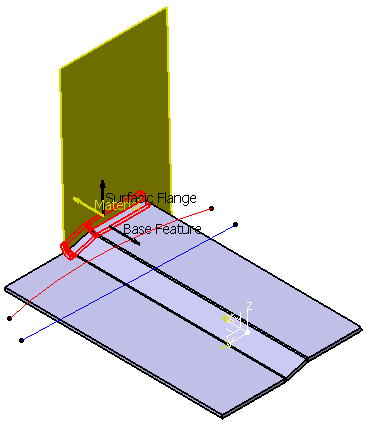
Instead, you have to select a sketch (displayed in red) or a curve (displayed in blue) to be able to build a surfacic flange. 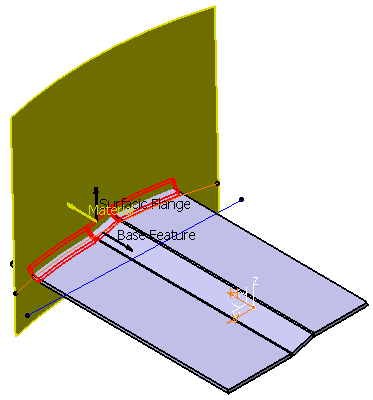
You can modify the Support Length generated by the curve and the angle. By default, the length is set to ten times the EOP (Edge of Part) length. If the default EOP length is higher than 100mm, you need to modify the surface length. 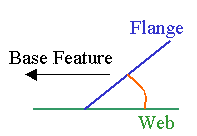
The red angle is the angle taken into account when creating the surfacic flange. -
Define the vectors' directions.
-
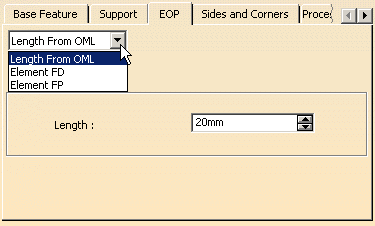
In the EOP (Edge Of Part) tab, you can define either:
-
a length from OML (Outer Mold Line): length between the curve defining the top of the surfacic flange and the OML,
-
an element FD (Folded): boundary element (either a surface that intersects with its surface, or a sketch, or a wire projected on its surface),
-
an element FP (Flat Pattern): curve or sketch defining the flattened profile of the surfacic flange.
The element FP must be included within the limits of the surfacic flange support when folded. -
-
Click OK.
The Surfacic Flange (identified as Surfacic Flange.xxx) is created and the specification tree is updated accordingly. 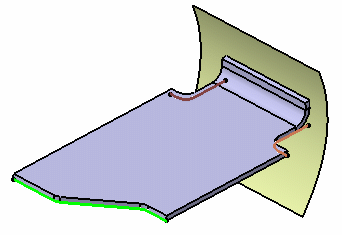
Surfacic Flange with a length from OML of 15 mm 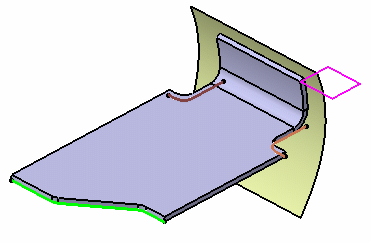
Surfacic Flange with Plane.2 (in pink) as Element FD 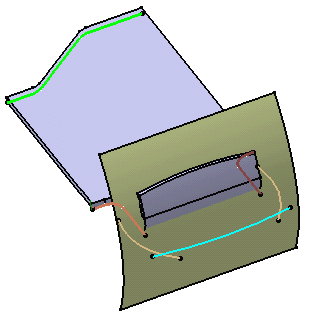
Surfacic Flange with EOP FP (in light blue) as Element FP 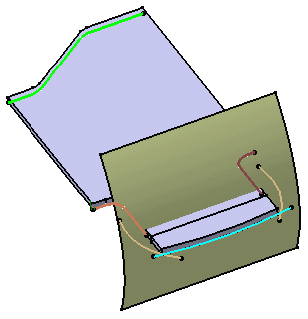
Unfolded view of the Surfacic Flange with EOP FP as Element FP. See Unfolding.
Sides and Corners
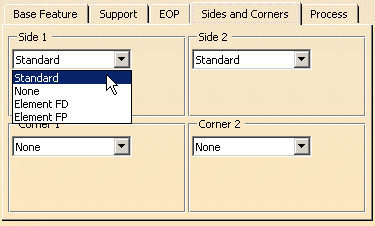 |
In the Sides and Corners tab, you can choose to define the following elements:
- sides (intersection between the Base Feature and a curve) as:
- standard: they are automatically defined at the web limit and the perpendicular plans are kept (in this case, the user does not have to define them)
- none: no side computed (only the EOP will define the profile of the Flange)
- element FD (Folded): they are defined by a folded geometrical element (curve, plane or surface).
- element FP (Flat Pattern): curve defining the flattened profile of the flange.
 |
| Surfacic Flange defined with a Length from OML of 10mm, and Side 1 and 2 as Standard |
 |
| Surfacic Flange defined with EOP FD as Element FD, and Side 1 and 2 as None |
 |
| Folded view of the Surfacic Flange with EOP FP as Element FP,
Side 1 FP and Side 2 FP (in light brown) as Side 1 and Side 2. See Unfolding. |
 |
| Unfolded view of the Surfacic Flange with EOP FP as Element FP,
Side 1 FP and Side 2 FP (in light brown) as Side 1 and Side 2. See Unfolding. |
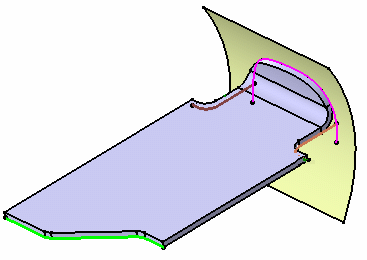
- The following examples show two cases of a flange defined by an EOP FP or FD and Sides as None.
There is an intersection between the EOP and the web support > the Surfacic Flange can be computed
There is no intersection between the EOP and the web support > the Surfacic Flange cannot be computed
- The following examples show two cases of a flange defined by an element FD as the EOP and Standard sides.
There is an intersection between the EOP and the side > the Surfacic Flange can be computed
There is no intersection between the EOP and the side > the Surfacic Flange cannot be computed
- The following examples show two cases of a flange defined by an element FP as the EOP and Standard sides.
There is an intersection between the OML and the EOP > the Surfacic Flange can be computed
There is no intersection between the OML and the EOP > the Surfacic Flange cannot be computed
- The following examples show three cases of a flange defined by an element FD as the side.
- The following examples show three cases of a flange defined by an element FD as the side.
|
|
Any cutout on the web will be taken into account to create the
surfacic flange's sides. For example, if you create a
cutout on the web, then create a surfacic
flange with standard sides, the latter will be calculated from the
web's profile including the cutout. For optimization reasons, we advise you to first create a sketch with the desired shape, then create the surfacic flange. |
|
A surfacic flange with a side limit defined by a
plane or a curve cannot be created in the case when the side projection
(displayed in blue on the second picture) of the top of the flange
overtakes the supporting surface.
|
||
| In such a case, you have to make sure the supporting surface is large enough before creating the flange. In the picture below, the supporting surface has been extrapolated. | ||
 |

The example above shows a Surfacic Flange with standard sides calculated from the web modified by a cutout (the cutout, shown in blue, is taken into account)
- corners (profile defined between the EOP and the sides) as:
- none: no corner computed (only the EOP is able to define the profile of the Surfacic Flange)
- corner: between the side and the EOP (defined with a radius value)
The example above shows a Surfacic Flange defined with Sides 1 and 2 as Standard, and Corners 1 and 2 of 10mm each.
|
|
|
Process
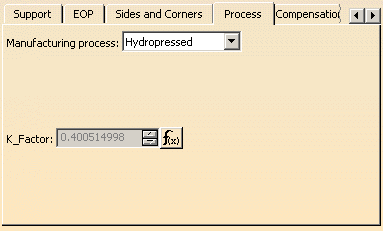
- Manufacturing process:
- Hydropressed
- BreakFormed
-
K_Factor: you can modify the K Factor as defined in the SheetMetal Parameters dialog box by changing the driving equation.
Click the icon. The Formula Editor
dialog box opens, you can modify the dictionary and the parameters. Or
you may need to deactivate the formula using the contextual menu on the
field and choosing Formula > Deactivate before editing the
value.
|
|
Prior to R16, in the Process tab, you could also use the Show curves in folded views and Show curves in flattened view check boxes to display the characteristic curves of a given surfacic flange on the folded view and/or on the unfolded view of the part. The display of characteristic curves is now managed through settings, and for an entire part. For more information, refer to Display in the Customizing chapter. |
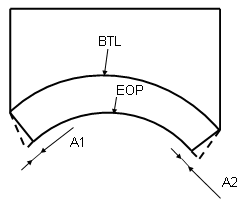
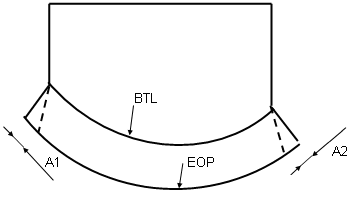
Compensations
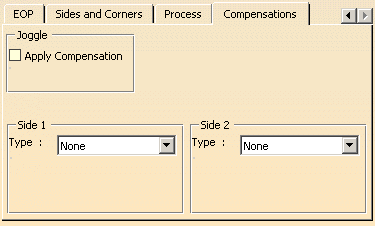
- Joggle:
- check the Apply Compensation button when creating or
editing the joggle.
See Creating a Joggle for further information.
- check the Apply Compensation button when creating or
editing the joggle.
Standard files and methods must be previously defined from the SheetMetal Parameters dialog box to have access to the Apply Compensation button.
- Surfacic Flange Sides (Side 1 and Side 2).
- Define the type:
-
None: no compensation is applied
-
Automatic: for symmetric flanges , A1=A2, so that the length of the flatten EOP = length of the folded EOP
-
Manual: Angle: the deformation is computed according to an angle
-
Manual: Length: the deformation is computed according to a length parallel to the BTL.
-
-
Define the Angle in the case of a Manual: Angle compensation. A negative angle adds material, and a positive angle removes material.
-
Define the Length in the case of a Manual: Length compensation
- Define the type:
|
|
|
Unfolded Surfacic Flange defined with Corners 1 and 2 of 10mm each, and no compensation for Side 1 and Side 2
Unfolded Surfacic Flange defined with Corners 1 and 2 of 10mm each, a Manual: Angle compensation of -20deg for Side 1 and no compensation for Side 2
Unfolded Surfacic Flange defined with Corners 1 and 2 of 10mm each, a Manual: Angle compensation of 20deg for Side 1 and -10deg for Side 2
More about surfacic flanges
Hybrid Design
- In hybrid design context, when the edge of a part and/or the surfacic flange are defined by a sketch, they follow the hybrid design aggregation rules.
- Yet, if you open a part created using an application release prior to Version 5 Release 14, the specification tree is displayed according to the rules implemented for that release.
For more information about Hybrid Design, refer to the Hybrid Design section in the Part Design User's Guide.
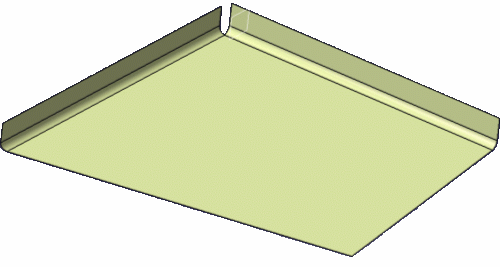
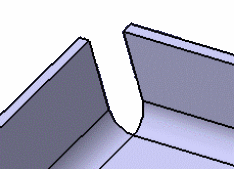
Creating Adjacent Flanges
Creating two adjacent flanges may be impossible for some specific flange topologies (the unfolded view cannot be computed properly). In this case, a specific warning message is displayed, advising you to create a notch on the web before trying to create the second surfacic flange.
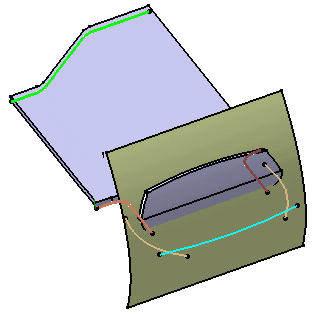
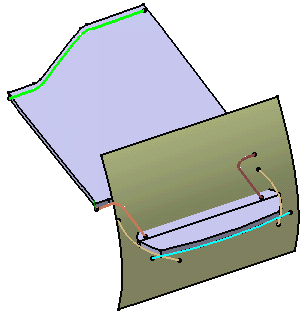
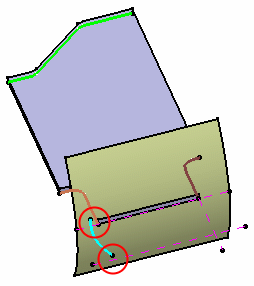
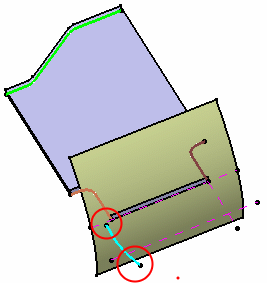
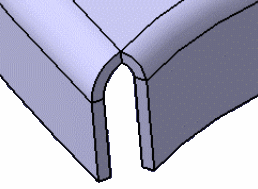
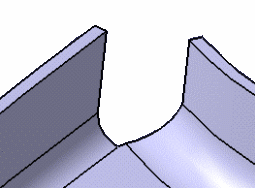
Intersecting surfacic flanges on a web
It is now possible to intersect two surfacic flanges on a web. This means that you can choose as a support a web with an existing surfacic flange that will go through the new surfacic flange.
The intersecting flanges are automatically detected, and the geometry of the first flange is relimited to enable the creation of the second flange; the unfolded view is computed accordingly. You can then remove the sharp vertex in the corner by creating a corner relief or a cutout at the intersection of the surfacic flanges.
|
|
|
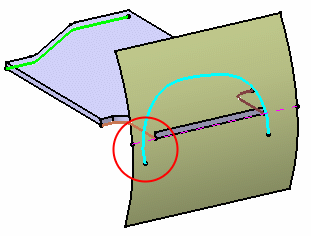
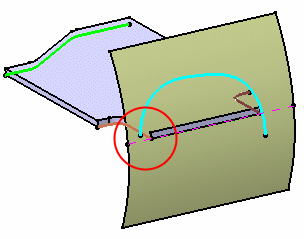
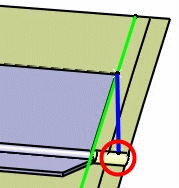
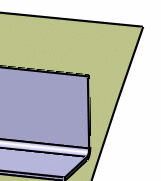
Joggled surfacic flangeYou cannot build a Surfacic Flange on a joggled Surfacic Flange. |
|
|
|
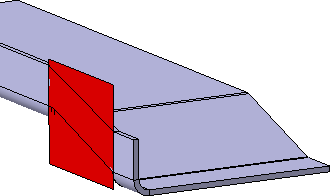
Do not create features on the surfacic flange located in
front of the joggle on web (see the area represented below by a red
rectangle): |
![]()