RADE |
Data Model Customizer for ENOVIA |
Customizing an ENOVIA Product Structure |
| Use Case | ||
AbstractThis article shows how to customize an ENOVIA Product Structure. |
Product modeler belongs to those modelers that require rigor
and knowledge of the model composition.
Product customization will not be as simple as an Action one. It
is quite
understandable owing to its complexity.
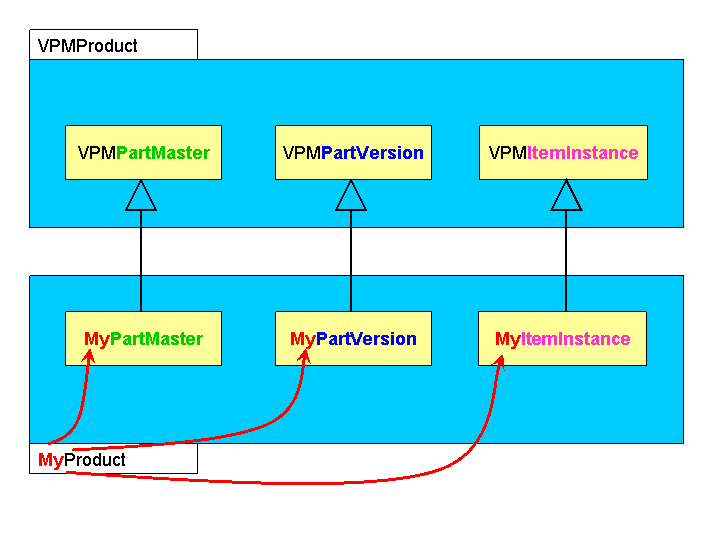
On the one hand, restrictions on names exist and have a great importance. Suffix of the inherited class must be conserved, and prefix of the new classes must be the same for all.
On the other hand, to build a product customization, you need to customize 3 classes belonging to Product structure modeler:
|
These restrictions are summed up in the graphic below.

You are going to customize a product and add an attribute to all customized classes:
File menu, select
New->Other->UML
Project. Click Next>.
Next> and
Finish.Navigator
view, right-click your project and select
Open as a DMC Project. Open a DMC
Project window, select the tool level and click
Next>.Close
in the Initializing tools
window.Add
and select your prerequisite frameworks. Click
Finish.Close
in the Installing Prereqs
window.[Top]
File
menu, select Other->DMC
Elements->New LCA Customization. Click
Next>.
Application Name field....
in the Customize LCA application
field. In the Select a framework window, select
Product Structure.
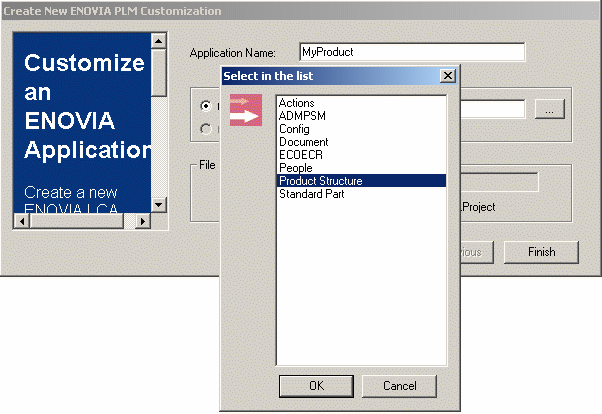
Finish. The wizard creates
a new workspace.[Top]
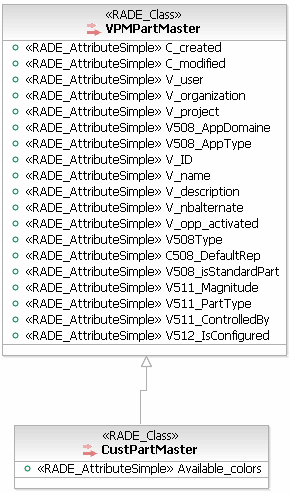
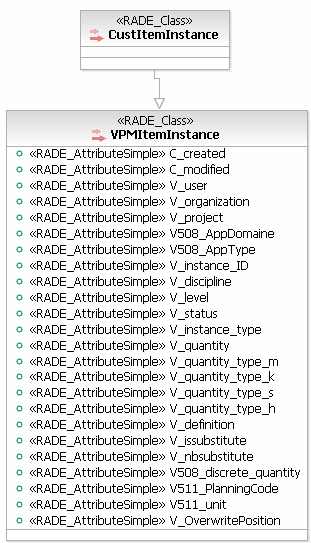
Remember that you have to customize three classes to create a Product Structure customization.
In the Navigator view, expand the MyProduct node and double-click the .emx file.
File menu, select
New->Other->DMC
Elements->New Modeler Object. Click
Next>. VPMPartMaster in the Combo Box.
Click Next>.
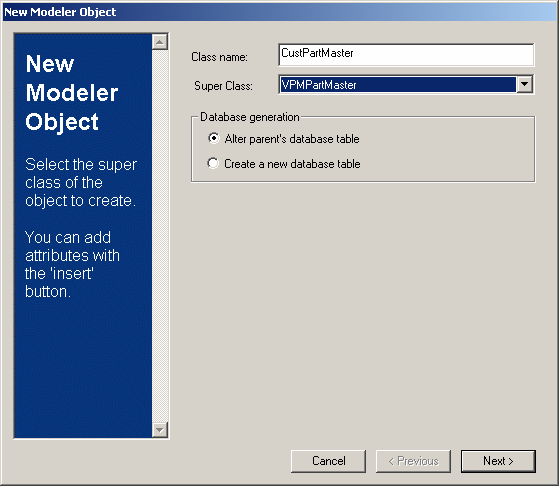
Click
Insert to add
an attribute to your CustPartMaster, Available_colors in this
example.
|
|
Insert button.
Finish to finish
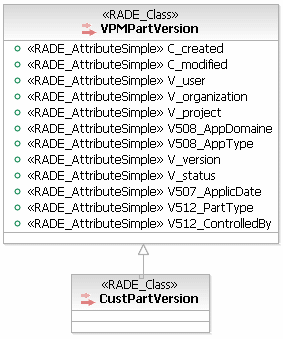
the command.VPMPartVersion and
VPMItemInstance. The
following UML graphics describe your customization.
 |
 |
 |
[Top]
 DMC Project->Generate
   VPM Dictionary file
.
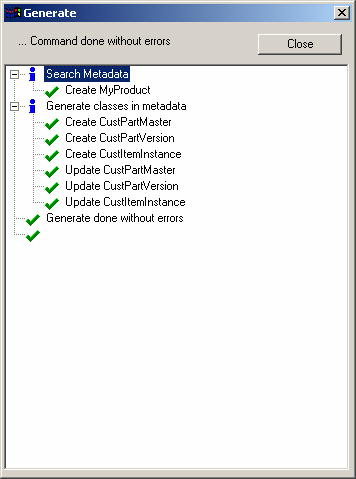
The wizard creates MyProduct.metadata under the directory MyProduct/CNext/code/dictionary.
[Top]
 DMC Project->Publish
   VPM Dictionary file in Database.
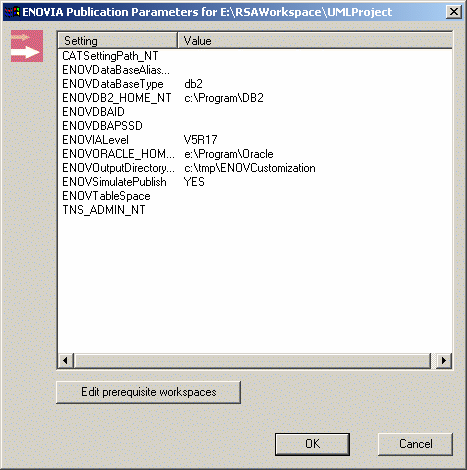
Check if the settings are correctly valuated and click
OK to start the Publish command to finish
the scenario.
Now it is time to test your customization.
To use this customization, launch ENOVIA within the environment of the customization. So just indicate the location where your customization is built on the server, as follows:
On UNIX:
$ENOVIA_INSTALLATION_PATH$/$OS$/code/command/enoviastart -direnv $EnvDir$ -env $EnvName$
where:
)On Windows:
$ENOVIA_INSTALL_PATH$/$OS$/code/bin/CATSTART -run "ENOVIA.exe" -direnv $EnvDir$ -env $EnvName$ -object "-senv $sEnvName$ -sdirenv $sEnvDir$"
where:
sEnvDir is the server environment folder containing the
sEnvName.txt file.
Now we can use our new customized Product in ENOVIA.

If we save a product in database, it can be easily retrieved in the search CATlet. By customizing, search entities are also modified to take into account the new products.

[Top]
| Version: 1 [Mar 2004] | Document created |
| Version: 2 [February 2006] | Document updated |
| [Top] | |
Copyright © 2006, Dassault Systèmes. All rights reserved.