 |
RADE |
Data Model Customizer for ENOVIA |
Migrating Existing ENOVIA MasksCustomizing ENOVIA |
| Quick Reference | ||
AbstractThis article explains how to migrate customized masks from an ENOVIA version N to a subsequent version of ENOVIA. The masks used in this sections are only samples. It would be too long to explain all the steps of an original DS mask, which can contain more than 4 000 lines. But we will present this migration as if the sample file was a DS mask, created during ENOVIA installation and customized then. |
You have used our ENOVIA R13 for a while, and to improve effectiveness, you have customized the default Dassault Systemes masks. Now you want to migrate from ENOVIA R16 to ENOVIA R17, and you would like to keep our masks customization, and also to take advantage of the new R17 functionalities. That is why you need to migrate your R16 masks to new R17 masks. Your ENOVIA server is installed on Windows.
To run the masks merger, the following files are required:
To get these files, run the following command:
1. $PREFIX$ -run "VPMPeopleUpdate -savemask /home/data/MaskMigration/DefaultN"
2. $PREFIX$ -run "VPMPeopleImport -savemask /home/data/MaskMigration/CustoN"
3. Then, run the ENOVIA LCA database migration
using the Upgrade507_Enovia.sh command. If you have customized your
database using RADE tools,migrate your CAA Workspace and launch a publish
on it. To do so, run : $PREFIX$ -run "VPMPeopleUpdate -savemask /home/data/MaskMigration/DefaultN+1"
where :
$ENOVIA_INSTALLATION_PATH$/$OS$/code/bin/CATSTART$ENOVIA_INSTALLATION_PATH$/$OS$/code/command/catstartFor further details on VPMPeopleImport, refer to ENOVIA V5 LifeCycle Applications Documentation: Administration Tasks: People, Organization and Security Tools.
You have now three masks which can be compared to evaluate which change must be done.
 |
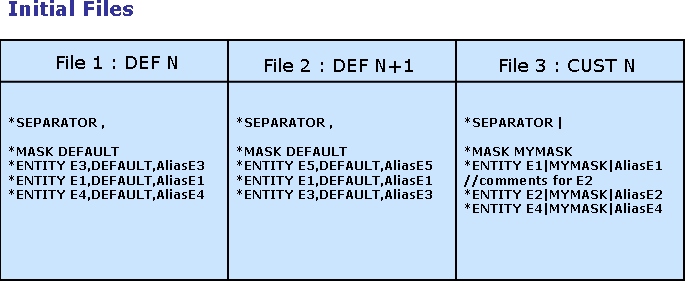
Here, we have our 3 mask files.
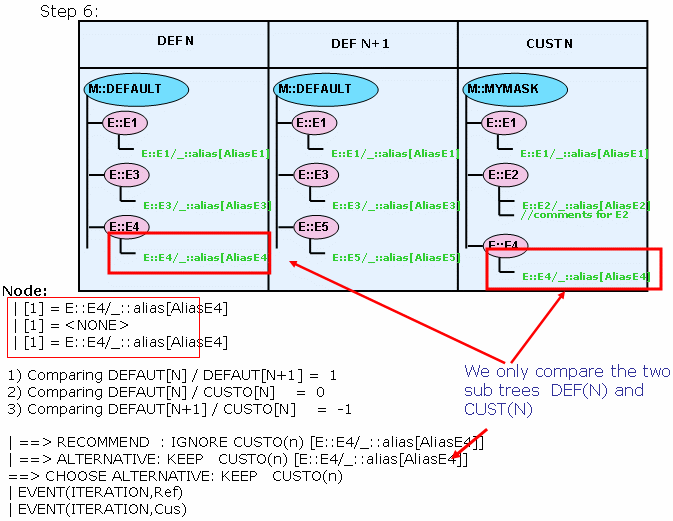
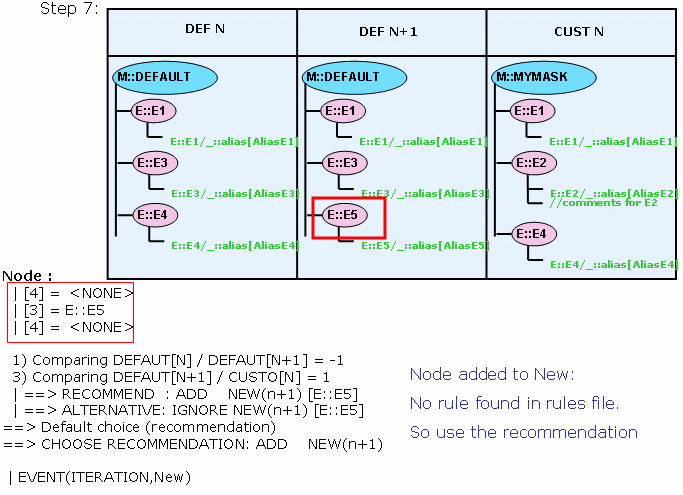
Between the default mask N and N+1, you can see that E5 has been added to our new default mask, and E4 has been removed from the old mask.
However, if you have a look at the customized mask, the entity E4 is used and has been customized. And the entity E3 has been removed, and E2 has been added...
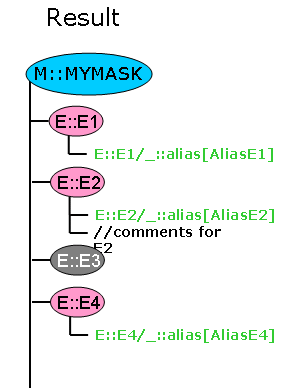
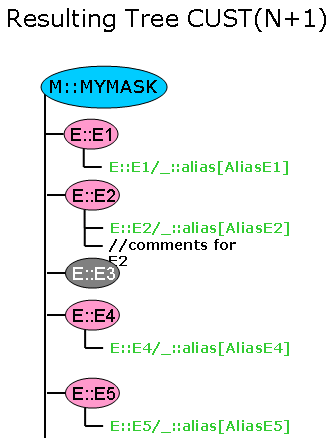
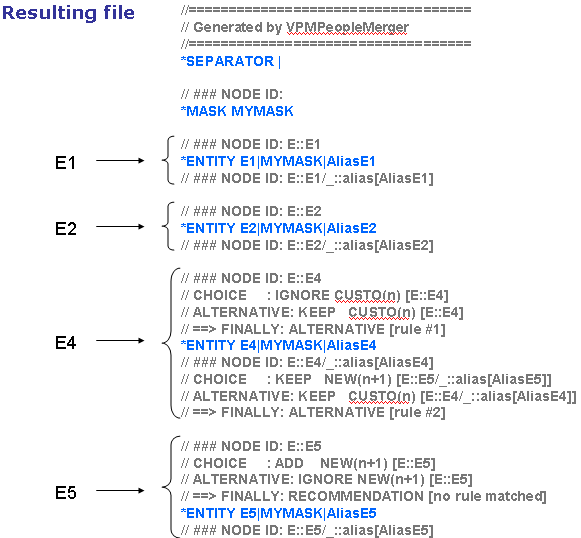
With the default behavior of the merger, you can expect that E4 will be removed from the new generated mask, E2 and E5 will be added.
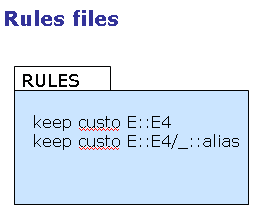
Let's assume that you want to keep entity E4. You must write some rules to explain this.
You keep the entity E4 which appears in the customized mask:
--® keep custo E::E4
As Keep action operates on the sub tree, define orders for the subtree. Here only one property is met. So you only want to keep the property alias appearing in the customized mask for entity E4:
--® keep custo E::E4/_::alias
You rules file is stored in: /home/data/MaskMigration/Rules.txt
 |
Once you have retrieved all needed files for the migration, run
the merger application.
So, launch the CATVBTMaskMerger command as follows :
$PREFIX$ -run "CATVBTMaskMerger FILE1
FILE2 FILE3 FILE4 -rule RULE" -direnv $EnvDir$ -env $EnvName$
where :
EnvName is the name of the RADE environment (
Default is : CAA_RADE.V5R14.B14 )EnvDir is the environment folderIn this example:
/home/data/DassaultSystemes/B14/aix_a/code/bin/catstart


-run "CATVBTMaskMerger


/home/data/MaskMigration/DefaultN/DEFAULT.custo


/home/data/MaskMigration/DefaultN+1/DEFALUT.custo


/home/data/MaskMigration/CustoN/customaskN.custo


/home/data/MaskMigration/CustoN+1/newcustomask.custo

                                                       -rule
/home/data/MaskMigration/Rules.txt"


-env CAA_RADE.V5R14.B14 -diren /home/data/DassaultSystemes/CATEnv
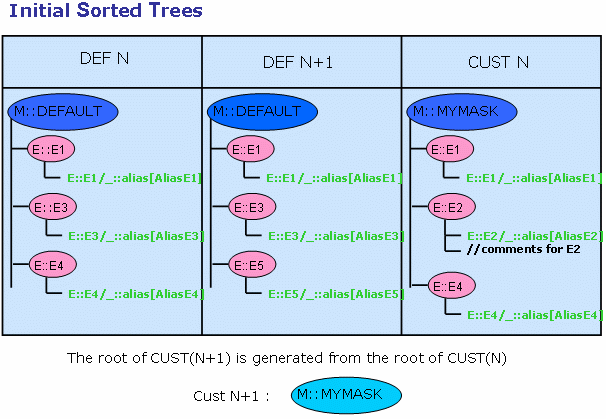
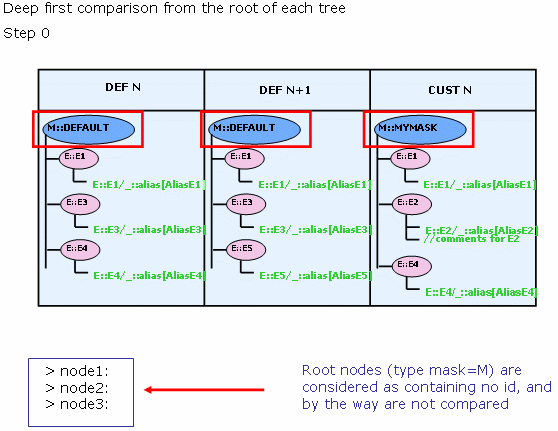
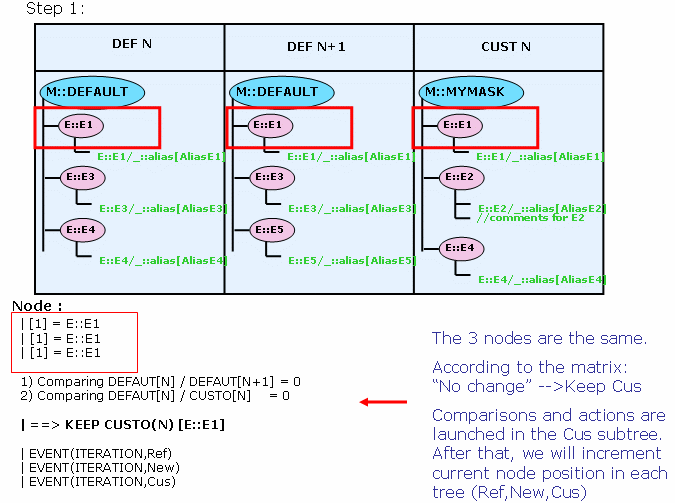
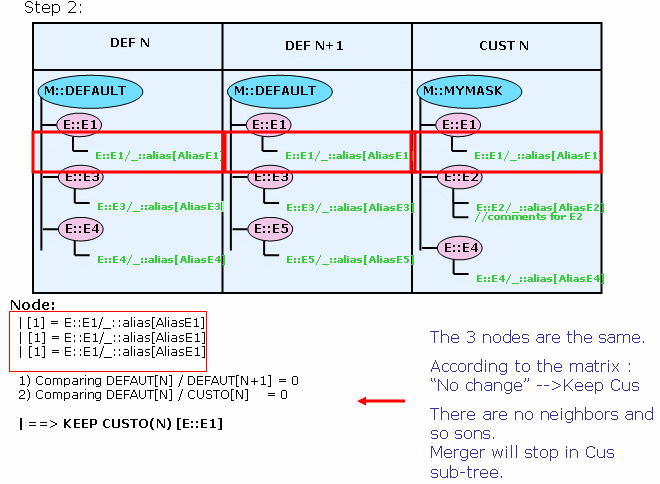
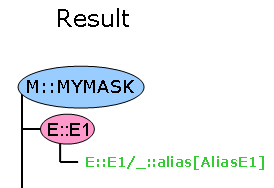
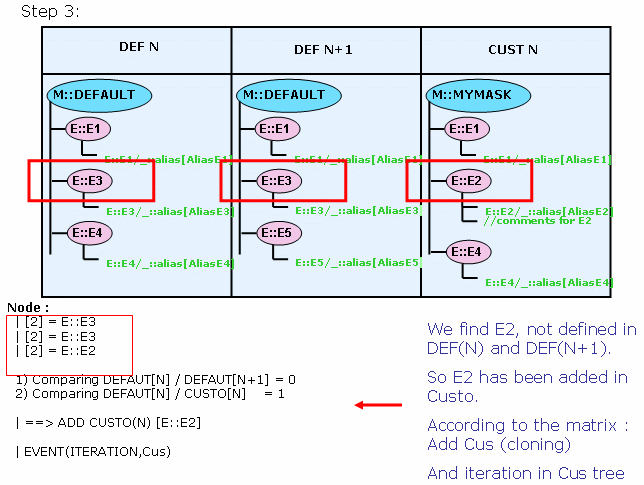
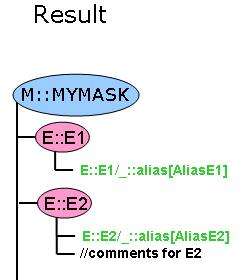
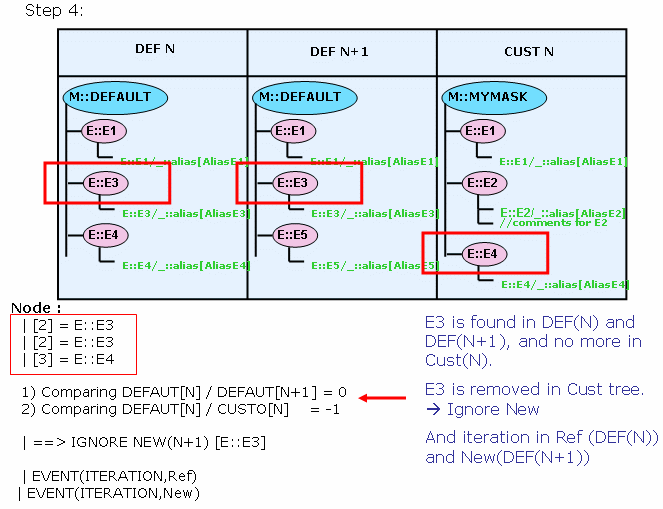
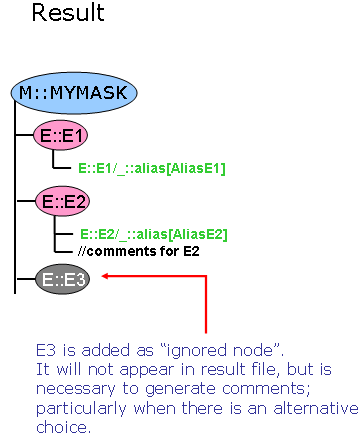
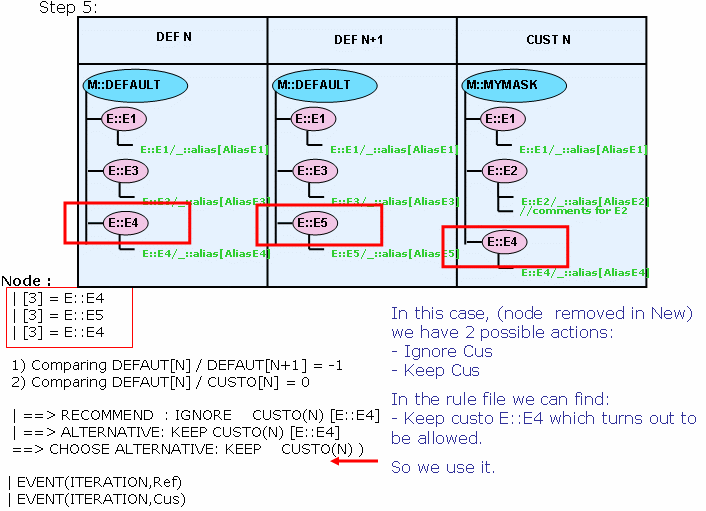
The following charts explain the different steps while merging these 3 masks:
[Top]
[Top]
[Top]
[Top]
[Top]
[Top]
[Top]
[Top]
[Top]
[Top]
[Top]
[Top]
[Top]
[Top]
[Top]
Import the new mask into the database using the following command:
$PREFIX$ -run "VPMPeopleImport /home/data/MaskMigration/CustoN+1/newcustomask.custo"
where :
| [1] | Understanding migration of customized mask |
| [2] | For more details on ENOVIA masks, refer to ENOVIA V5 LifeCycle Applications Documentation: Enterprise Architecture Foundation: Enterprise Architecture Administration Guide: Administration tasks: Understanding Object Access Control. |
| [Top] | |
| Version: 1 [March 2004] | Document created |
| Version: 2 [March 2006] | Document updated |
| [Top] | |
Copyright © 2006, Dassault Systèmes. All rights reserved.