RADE |
Data Model Customizer for ENOVIA |
Customizing the ECO/ECR Modeler |
| Use Case | ||
AbstractThis article shows how to create a customization on ENOVIA ECOECR. |
|
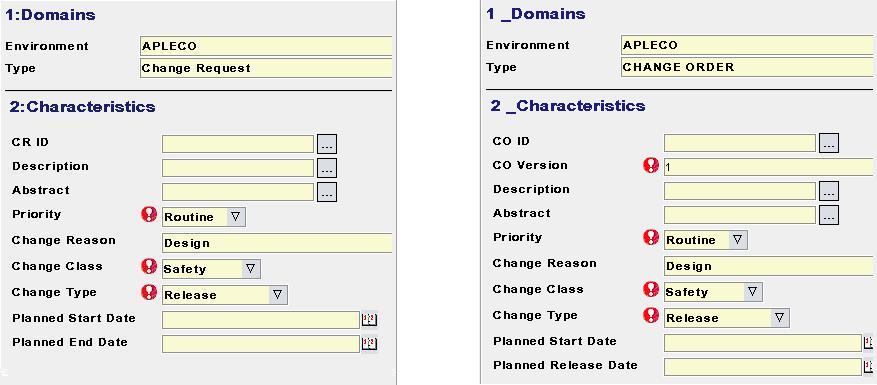
Let's customize a change request (ECR) and a change order (ECO) which do not necessarily have to be customized together.
You are going to add 2 new fields to each component:
for ECR |
a date Attribute1 |
| a double Attribute 2 | |
for ECO |
a list of boolean MyFirstAttribute |
| a string MySecondAttribute |
[Top]
File
menu, select New->Other->UML
Project. Click
Next>.
Next> and
Finish.Navigator
view, right-click your project and select
Open as a DMC Project. Open a DMC
Project window, select the tool level and click
Next>.Close
in the Initializing tools
window.Add
and select your prerequisite frameworks. Click
Finish.Close
in the Installing Prereqs
window.[Top]
File
menu, select New->Other->DMC
Elements->New LCA Customization. Click
Next>.
Application Name field....
in the Customize LCA application
field. In the Select a framework window, select
ECOECR.

Finish. The wizard
creates a new workspace. [Top]
Navigator view,
expand the MyECOECR node and double-click the .emx file. From the File menu, select
New->Other->DMC
Elements->New Modeler Object. Click
Next>.
ECO in the
list and click Next>.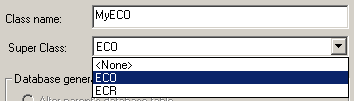 |
Insert to add
the
attribute MyFirstAttribute to your MyECO.
Name field and select
STRING in
the Type
list. Click OK.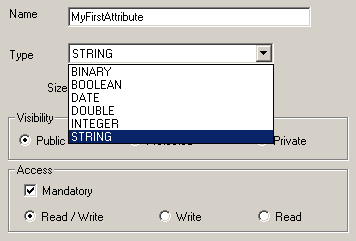 |
Insert to add
the
attribute MySecondAttribute to your MyECO.
Name field and select
STRING in
the Type
list. Click OK.
Insert button.Finish
when done.In the
Navigator view,
expand the MyECOECR node and double-click the .emx file.
File menu, select
New->Other->DMC
Elements->New Modeler Object. Click
Next>. ECO in the
list and click Next>.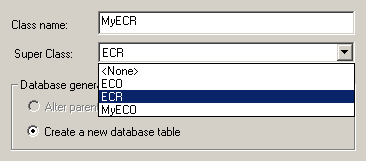 |
Insert to add
the
attribute Attribute1 to your MyECR.
Name field and select
DATE in the
Type list. Click
OK.
 |
Insert to add
the
attribute Attribute2 to your MyECR.
Name field and select
DOUBLE
in the Type
list. Click OK.
Insert button.Finish
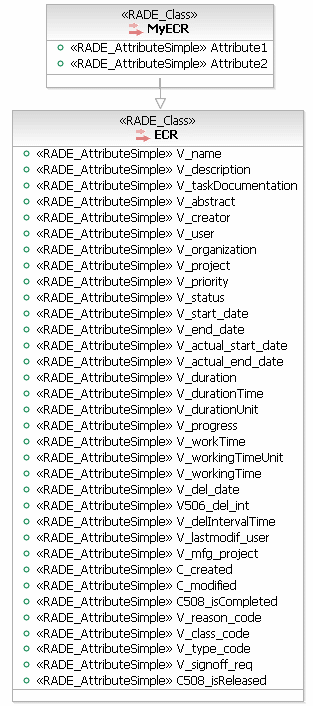
when done.Here is the UML graphic describing your customization.
UML Graphic for ECO |
|
UML Graphic for ECR |
 |
 |
[Top]
 DMC Project->Generate
   VPM Dictionary file
.
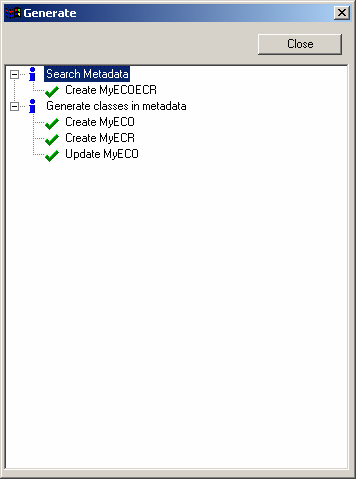
The wizard creates MyECOECR.metadata under the directory MyECOECR/CNext/code/dictionary. Close IBM Rational Software Architect or IBM Rational Software Modeler.
[Top]
 DMC Project->Publish
VPM Dictionary file in Database.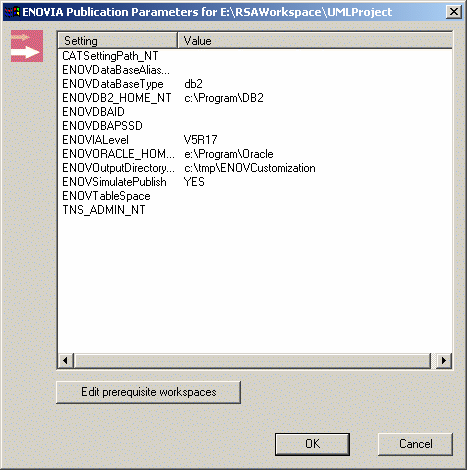 |
Check if the settings are correctly valuated and click
OK to start the Publish command to finish
the scenario.
[Top]
Now it is time to test your customization. To use this customization, launch ENOVIA with the environment of the customization. To do so, indicatethe location where your customization is built on the server, as follows:
On UNIX:
$ENOVIA_INSTALLATION_PATH$/$OS$/code/command/enoviastart -direnv $EnvDir$ -env $EnvName$
where :
ENOVIA_INSTALLATION_PATH is the location where you installed the ENOVIA CD.
OS is the operating system tag (eg. solaris_a, aix_a, hpux_b).
EnvDir is the environment folder containing the EnvName.txt file
EnvName is the name of the ENOVIA environment ( Default is :
ENOVIA_LCA.V5R17.B17 )
On Windows:
$ENOVIA_INSTALL_PATH$/$OS$/code/bin/CATSTART -run "ENOVIA.exe" -direnv $EnvDir$ -env $EnvName$ -object "-senv $sEnvName$ -sdirenv $sEnvDir$"
where :
ENOVIA_INSTALLATION_PATH is the location where you installed the ENOVIA CD.
OS is the operating system tag (eg. intel_a).
EnvDir is the environment folder containing the EnvName.txt file
EnvName is the name of the ENOVIA environment ( Default is : ENOVIA_LCA.V5R17.B17)
sEnvName is the name of server environment contained in your new customization workspace ( Default is :WorkspaceEnv
sEnvDir is the server environment folder containing the
sEnvName.txt file
Now, when creating a new CustoECR,
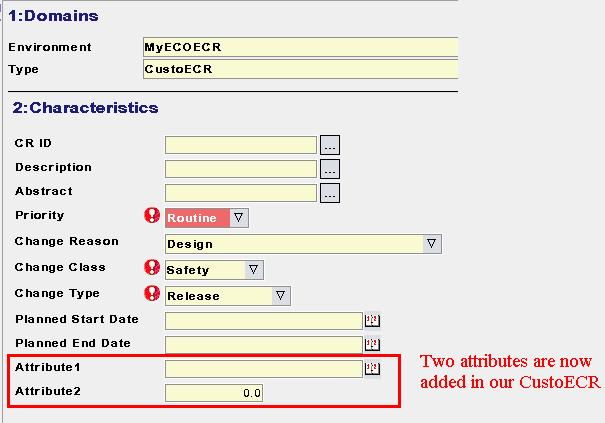
and when searching for our new object committed in the database:
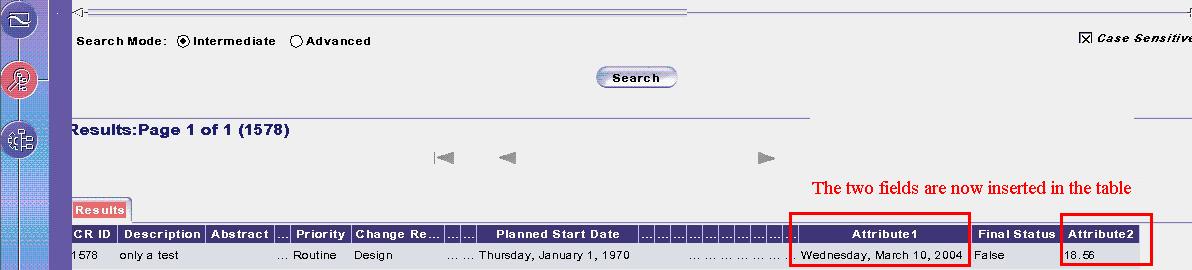
The same behavior is expected for MyECO.
[Top]
| Version: 1 [Mar 2004] | Document created |
| Version: 2 [March 2006] | Document updated |
| [Top] | |
Copyright © 2006, Dassault Systèmes. All rights reserved.