RADE |
Data Model Customizer for ENOVIA |
Customizing the Document Modeler |
| Use Case | ||
AbstractThis article presents a comprehensive customization example on ENOVIA People. |
The Document modeler belongs to those modelers that require rigor
and knowledge of the model composition.
Document customization will not be as simple as an Action one. It
is quite
understandable owing to its complexity.
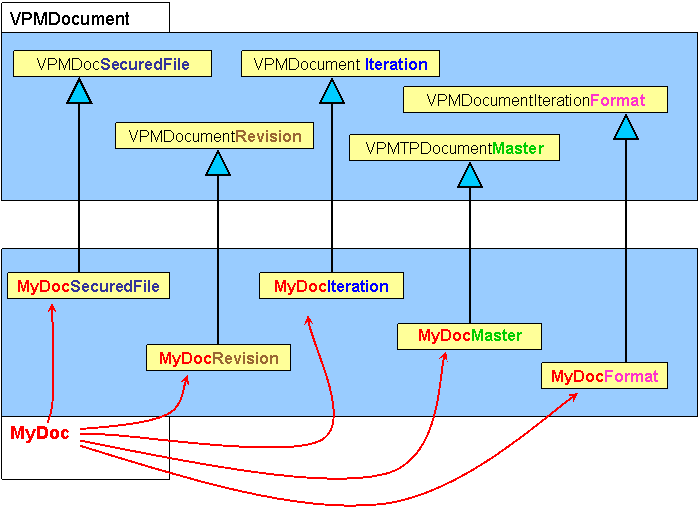
On the one hand, restrictions on names exist and have a great importance. The suffix of the inherited class must be kept, and the prefix of the new classes must be the same for all.
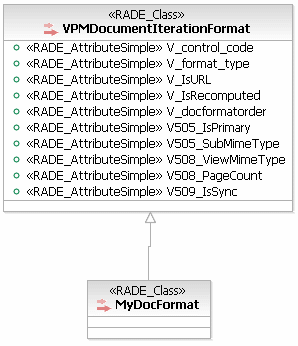
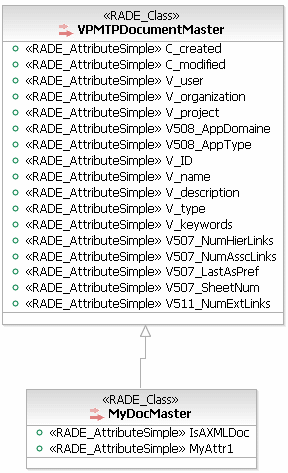
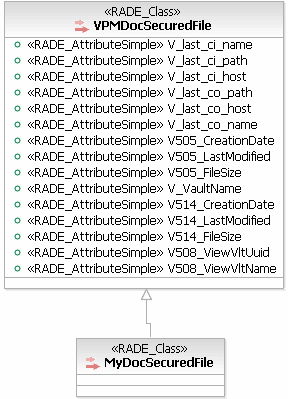
On the other hand, to build a Document customization, you need to customize 5 classes belonging to the Document modeler : VPMDocSecuredFile, VPMDocumentIteration, VPMDocumentRevision, VPMDocumentIterationFormat and finally VPMTPDocumentMaster.
These restrictions are summed up in the graphic below.
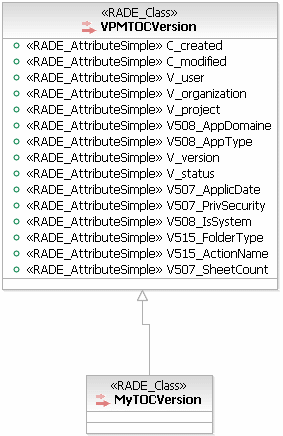
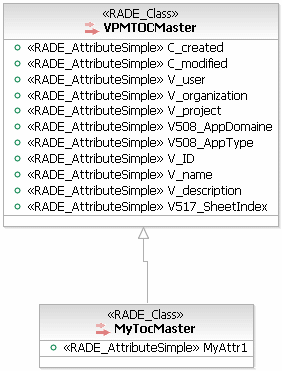
You can also customize tables of contents if needed. To do this, just respect the same restrictions as documents ones, and inherit from VPMTOCMaster and VPMTOCVersion.

You are going to customize a Document with a new customized table of contents.
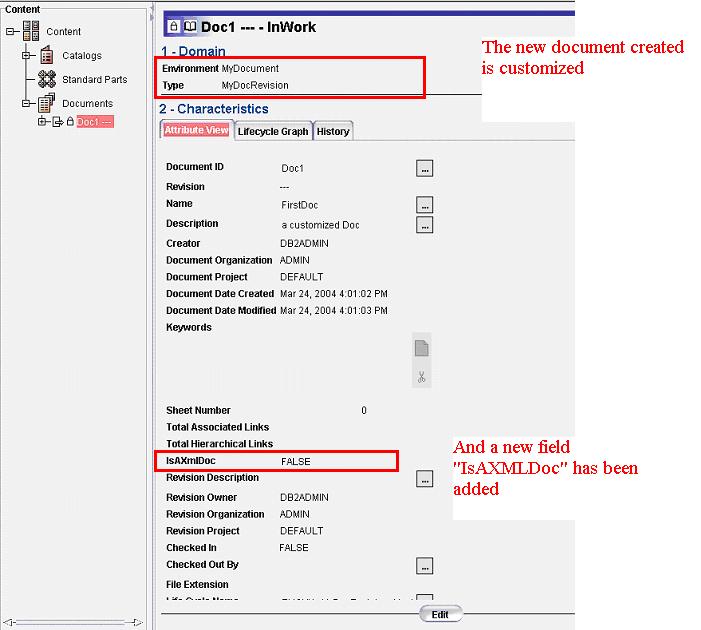
Add an attribute to MyDocmaster, a boolean named IsAXMLDoc.
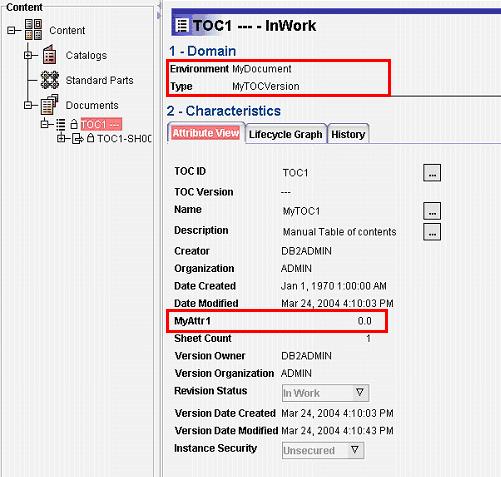
Add an attribute to MyDoCMaster, a double named MyAttr1.
[Top]
File
menu, select New->Other->UML
Project. Click
Next>.
Next> and
Finish.Navigator
view, right-click your project and select
Open as a DMC Project. Open a DMC
Project window, select the tool level and click
Next>.Close
in the Initializing tools
window.Add
and select your prerequisite frameworks. Click
Finish.Close
in the Installing Prereqs
window.[Top]
File
menu, select New->Other->DMC
Elements->New LCA Customization. Click
Next>.
Application Name field,
MyDocument in this example....
in the Customize LCA Application field. The
Select a framework dialog box opens.
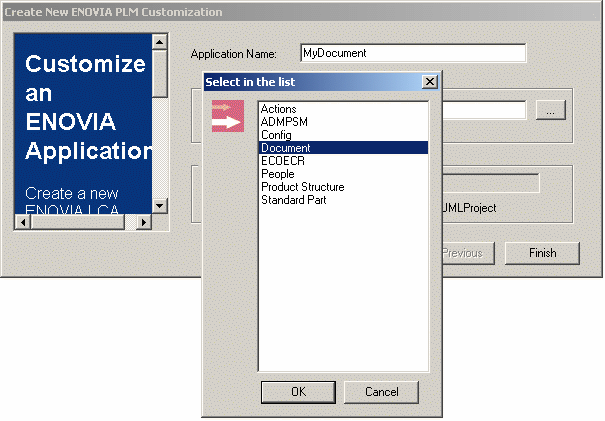
Document. The list of
the Use Package is automatically updated with the Use Package corresponding
to the application.OK. Finish. The wizard
creates a new workspace.[Top]
Remember you have to customize five classes to create a Document customization.
File
menu, select Other->DMC elements->New
Modeler Object. Click
Next>. The
New Modeler Object window opens.
Class name field,
MyDocMaster in this example.VPMTPDocumentMaster, in the list. Click Next>. |
Insert in
the Attributes field to add the IsAXMLDoc
attribute to your MyDocMaster.
Name field and select
Boolean in
the list. Click Finish
when done. |
Insert in
the Attributes field to add the MyAttr1
attribute to your MyDocMaster.
Name field and select
Double in
the list. Click
Finish when
done.
Insert
button. OK
to finish the command.
Repeat these operations for:
|
|
|
|
VPMTOCMaster and
VPMTOCVersion must be derived only if you want to
customize a Table of Contents. |
You should now discover new UML schemas describing your customization. These UML representations will appear in several windows. Below they are gathered to show the global model.
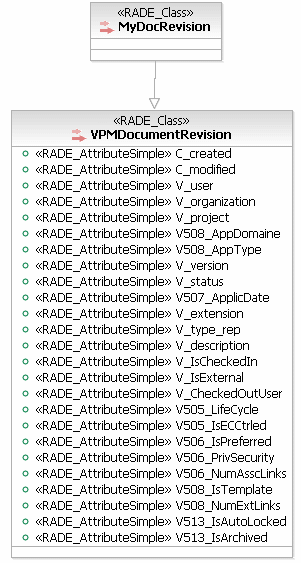
VPMDocumentRevision |
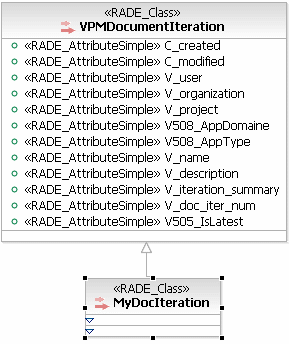
VPMDocumentIteration |
VPMDocumentIterationFormat |
||
 |
 |
 |
||
VPMTPDocumentMaster |
VPMDocSecuredFile |
|||
 |
 |
VPMTOCVersion |
VPMTOCMaster |
 |
 |
Now, let's prepare ENOVIA execution. Original class names are
imposed, and linked together by their names. But now, by customizing the
modeler, we have decide to use new class
names. ENOVIA can not guess the name of these customized classes and therefore,
if link are not recreated, ENOVIA can not use these raw data (in particular,
saves will not work).
So have a look to the followings steps:
The goal of this step is only to overload the original link to
take into account our new customized class.
In this modeler, we have to overload four (or five if we customize TOC)
relationships.
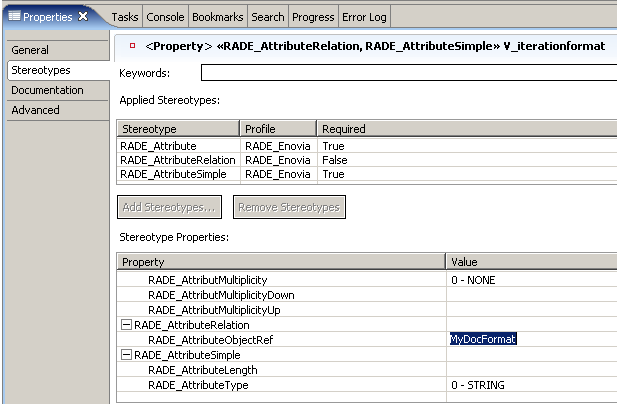
Add UML->Attribute.Enter the name of the new attribute (the name of this
attribute MUST be: V_iterationformat) and edit it in the
Properties view.
In the Properties
view, select the Stereotypes tab,
click Add Stereotypes and check
RADE_AttributeRelation.
In the Stereotype
Properties, you need to enter the
name of the pointed class as RADE_AttributeObjectRef. Here enter MyDocFormat
as follows:
 |
And repeat this operation for the relationships presented in the following schema:
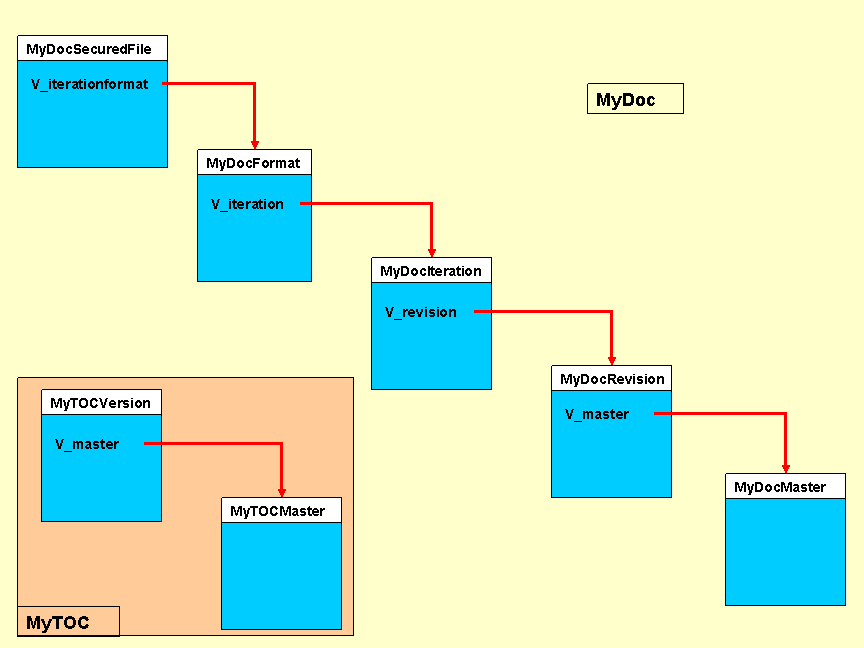 |
[Top]
DMC
Project
menu, select
   Generate
   VPM Dictionary file
.
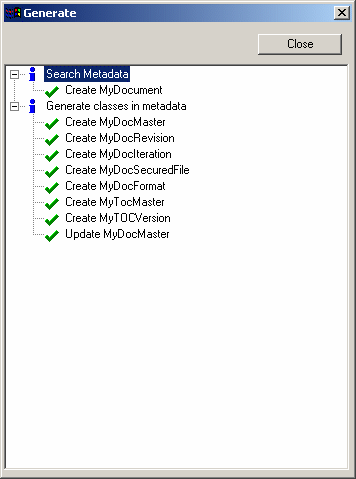
The wizard creates MyDocument.metadata under the directory MyDocument/CNext/code/dictionary. Close Close IBM Rational Software Architect or IBM Rational Software Modeler..
[Top]
 DMC Project->Publish
VPM Dictionary file in Database.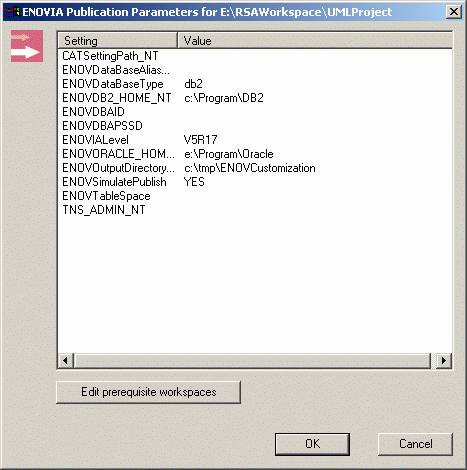 |
[Top]
Check if the settings are correctly valuated and click
OK to start the Publish command to finish
the scenario.
Now it is time to test your customization. To use this customization, launch ENOVIA within the environment of the customization. To do so, indicate the location where your customization is built on the server, as follows:
$ENOVIA_INSTALL_PATH$/$OS$/code/bin/CATSTART -run "ENOVIA.exe"
-env $EnvName$ -direnv $EnvDir$ -object "-senv $sEnvName$ -sdirenv
   $sEnvDir$"
where :
) )sEnvDir is the
server environment folder containing the sEnvName.txt fileNow we can use our new customized document in ENOVIA.
We can also create a new customized TOC to which we will add new documents :

[Top]
| Version: 1 [Mar 2004] | Document created |
| Version: 2 [March 2006] | Document updated |
| [Top] | |
Copyright © 1994-2006, Dassault Systèmes. All rights reserved.