
|
This function is meant to copy and
paste elements in the same design document. If you have more than one
work package in the document you can copy elements from one work package
and paste them in another work package. Or paste into new work
packages created under the same design document. But you cannot paste in a new
design document, in a new window. All typed objects, and runs, can be
copied.
The copy/paste operation consists of two distinct steps: the
copy portion creates elements for you to copy; the paste portion uses the
Translate function to position the copied elements in your document. See
the tasks related to Translate in this section for information about the Translate
function. |
 |
1. |
Open your document and click the
Copy/Paste 3D Systems button
 .
The Copy-Paste 3D Systems dialog box displays. .
The Copy-Paste 3D Systems dialog box displays.
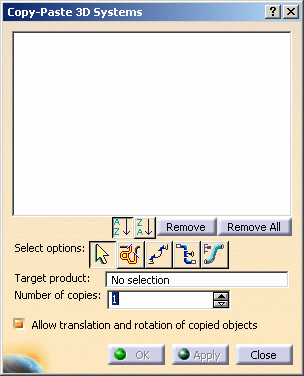
Select an option for copying elements. Five options are available for
selecting the elements you want to copy. All five are described below.
Use one of these options. |
|
2. |
Select Objects: Allows
you to select elements in your design. They are added to the dialog box
as you select them.

|
|
3. |
Select Elements in Range:
Selecting this displays the Analyze Networks dialog box. You
can select the elements to copy by selecting the From and
To elements in your design. They will display in the
Analyze Networks dialog box. 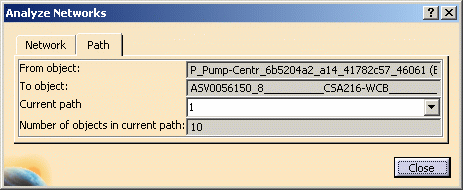
|
|
4. |
Select Spools: Selecting this
option displays a dialog box that shows all the spools in your design.
Select one or more spools and click OK. The elements in the spools will
display in the Copy-Paste 3D Systems dialog box.
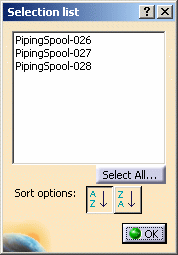
Spools will only display if you are in an application that allows you to
use them. To illustrate, if you are in Equipment Arrangement, then
spools will not display in the Selection List, even if they exist in
your design. |
|
5. |
Select Line
IDs: This option
displays a dialog box that shows the Line IDs in your design. Make your
selection and click OK. All elements in the Line ID will display in the Copy-Paste 3D Systems
dialog box.
 |
|
6. |
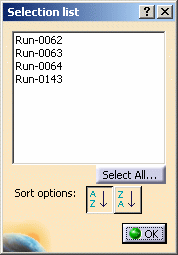
Select Run(s) Under an Active
Parent: The option shows you all the runs under the active parent.
In the specifications tree, double-click the product or work package you
want to make active, then click the button. A dialog box displays all
runs under that parent. Make your selection and click OK.
 |
|
7. |
Use the Sort buttons to
sort elements -ascending or descending - displayed in the Copy-Paste 3D Systems
dialog box. |
|
8. |
The Remove and
Remove All buttons can be used to remove selected
elements, or all elements, displayed in the Copy-Paste 3D Systems
dialog box. Elements contained in a spool are grayed out, and cannot be
removed. |
|
9. |
Select or enter the number of
copies you want. |
|
10. |
After you have selected the
elements to copy, using one of the methods described above, select the
Target Product field and then select the product or work
package in which
you want to create the copied elements. |
 |
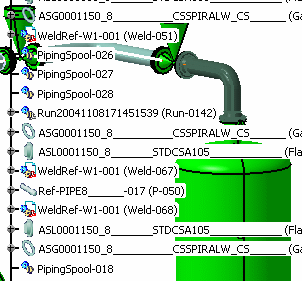
The copied element is created on
top of the existing element. It does not display as a separate element
in the viewer, although it has a separate entry in the specifications
tree. In the image below, the copied spool (PipingSpool-028) has been
copied as PipingSpool-018, as you can see in the specifications tree. In
the design, however, you do not see PipingSpool-018 as a distinct spool.
It has been copied and superimposed on PipingSpool-028.
 |
|
11. |
Click OK when you are done. If you
have checked the option Allow translate and rotate copied objects
then the Translate Objects dialog box will display. If the
option was not checked then you will exit the command. |


