 |
This task shows you
how to query a document to find out how many auto parts it contains. You
can also convert auto parts into 'non-auto' parts. |

|
Auto parts are so
called because they are placed automatically when you place certain other
parts. When you delete the part with which they are associated, the auto
parts are also deleted. In addition, auto parts cannot be modified.
However, you can use this function to convert them to 'non-auto' parts, in
which case their behavior will be like that of normal parts. |

|
1. |
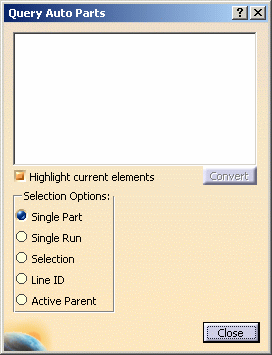
With your document open, click
the Query Auto Parts button
 . The Query Auto
Parts dialog box displays. . The Query Auto
Parts dialog box displays.

|
|
2. |
If you check the option
Highlight current elements then the auto parts that display in the
dialog box window will be highlighted in the 3D viewer. |
|
3. |
Choose one of the Selection
Options.
- Single part: Select a part and this option. All auto parts associated
to the part will display in the dialog box window.
- Single Run: Select a run and this option. All auto parts in the run
will display in the dialog box window.
- Selection: First make your selection in the document, then click the
Query Auto Parts button to open this dialog box, and select
this option.
- Line ID: Select a line ID and this option. All auto parts in the line
ID will display in the dialog box window.
- Active Parent: Select the active parent of the part/parts and this
option.
Once you make your selection the auto parts will display in the window.

|
| |
4. |
To convert auto parts, click the
Convert button. The action will apply to all auto parts
displayed in the Query Auto Parts dialog box. A second dialog
box will ask you to confirm the action. Click OK to convert the
parts. |
|
 |