Modifying or Deleting Connectors
|
|
This task shows you how to modify or delete connectors. | |
|
|
You will not be able to modify or
delete a connector that has constraints or connections.
You will not be able to modify or delete a connector on the instance of a part using the Modify or Delete commands in the Manage Connectors dialog box. You can only modify or delete connectors on the reference of a part (the part in the master catalog). You need to use the Create Part command to modify a reference part. However, you can modify or delete a unique part using the Manage Connectors dialog box. T |
|
|
|
1. | To delete a connector select the resource by double clicking in the specifications tree and click the Build Connectors button. This will display the Manage Connectors dialog box. |
| 2. | Select the connector in the connectors list and click the Delete button. The connector will be deleted. | |
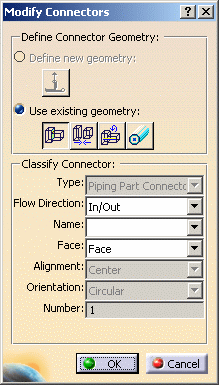
| 3. | To modify a connector click the
Modify button in the Manage
Connectors box. The Modify Connectors dialog box displays.
Fields that are grayed out cannot be modified for the selected connector.
|
|
| 4. | Follow the procedures described in Step 4 and subsequent of Creating Connectors. | |
|
|
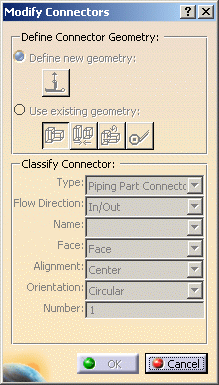
When you click the Modify
button in the Manage Connectors dialog box with a light
part or standard part displayed, the Modify Connectors
dialog box that displays will be grayed out. This is because the Build
Connector command should not be used to create or modify connectors
on light or standard parts. The grayed out dialog box is displayed only to
allow you to see the properties of the connector. If you want to modify
them you must use the Define Connectors command in the
Create Part dialog box.
|
|
|
|
||

