|
 |
This task describes
how to create a run. When you create a run you "reserve" space in
your work area so that you can later place tubes and parts. In the example
below you will create a run in "free space". In actual practice you will
create runs in a much more controlled environment - the deck of a ship, or
floor of a house, for instance. In the example below it does not matter
where you begin or end a run - but when you are working on a project you
will have to start and end at specific places, and your run will have to be
a certain size and shape. For more information on runs and routing see
Routing a Run. |
 |
You will learn more
about line IDs later, but you should know that a run is associated with a
line ID.
A line ID is an organizational element that identifies the type and
nominal size of the run (e.g., tubing, 1/2 in.) but may also include
attributes such as tubing specification, design and operating temperature
and pressure, insulation thickness, etc. These properties of the line ID
ensure that the parts you place meet the requirements of the line ID and
the intended design. Thus, when you make a run it is part of a line ID.
The line ID of your run is displayed on the upper toolbar on the left
hand side.

To learn more, including how to select a line ID, see
Manage Tubing Lines. |
 |
1. |
Click the Route a Run
button
 .
The Run dialog box opens. .
The Run dialog box opens.
Note: If the Design Rule: Multiple Rule Found dialog box opens, this
means there is more than one type of run to choose from. For example, there
could be multiple choices for Turn Radius, Diameter Factor or Number of
Miter Cuts. For this scenario the choice is unimportant because you are
learning the fundamentals of creating a basic run. Select from the table
and click OK. |
|
2. |
In the Run dialog box select either
Point-To-Point
 or Orthogonal
 for the routing Mode.
 |
|
3. |
Click the
Section button. The Section dialog
box opens showing the available section types
 . In
Tubing Design the section choices are No Section or Round
Section. Leave this set to Round Section. Check to make sure the
display setting is set to Solid . In
Tubing Design the section choices are No Section or Round
Section. Leave this set to Round Section. Check to make sure the
display setting is set to Solid
 .
Click OK in the Section dialog box. .
Click OK in the Section dialog box.
This returns you to the Run dialog box. Section dimensions, Turn radius
and Minimum length fields display the default values of the Line ID being
used. |
 |
For more information
on the settings and options used in the Run and Section dialog boxes see
Routing a Run. |
|
4. |
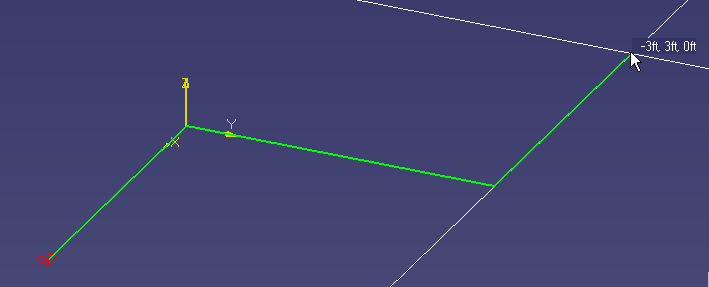
To begin your run, click at any point, move
the pointer in any direction, and click again. This is the first segment of
the run. Now move the pointer to the next position and click. Create a
simple run with three segments as show below.

|
|
5. |
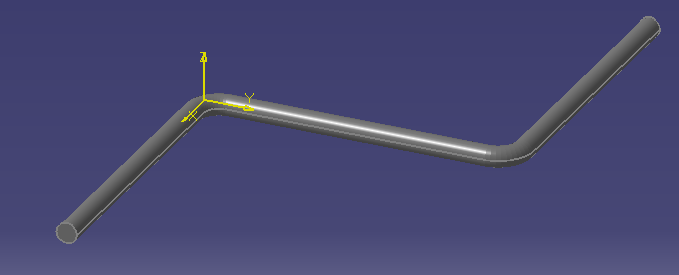
Double click to complete routing. The run
displays as a solid.

|
|
6. |
You have created a run with three
segments. You are now ready to place tubes and other parts in it. |
|
 |
![]()
![]()


![]()