Concept
This allows the administrator to manage all CATIA data seamlessly in the proper environment in order to prevent saving data in the wrong CATIA version, wrong Drawing standards, etc.
The administrator builds a suitable environment for CATIA. When the user uses this environment and saves an object to SmarTeam, the object is saved with the correct mapping of the CATIA Environment Name.
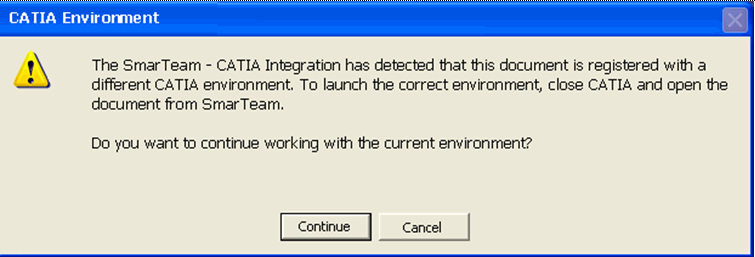
When opening a CATIA document from SmarTeam, the appropriate CATIA environment is opened for editing the document. If a different CATIA environment is already open, a warning message notifies the user that the current environment is not the correct environment for editing the document.
Configuration
The Multiple CATIA Environment configuration comprises two stages:- Database Preparation
- CATIA Environment Definition and Registration in SmarTeam
Database Preparation
This section includes running the Data Model Designer and creating a profile card for OEM environments.
To prepare the database:
-
Launch the SmarTeam Data Model Designer.
-
From the File menu, select Modify Database Structure.
-
Select the R19 Database.
-
Validate the warning message and log in as joe.
-
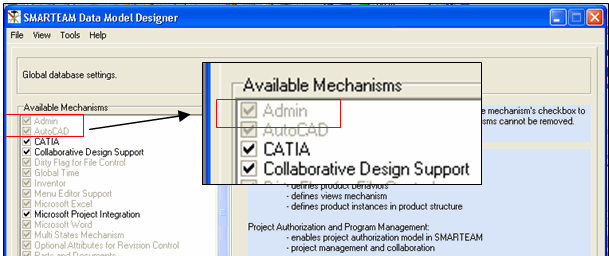
Check that the Admin Mechanism is selected in the list of Available Mechanisms.
-
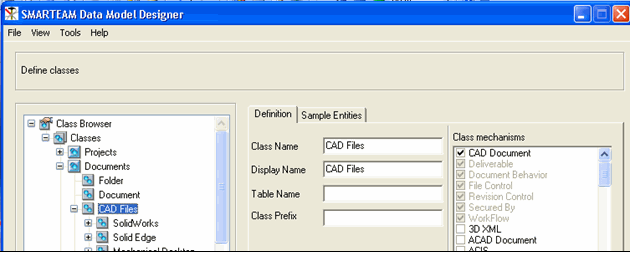
Click on Next and enable the CAD Document behavior for the CAD files.
-
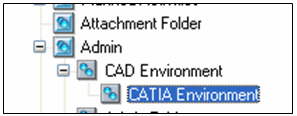
Verify that under the Admin Superclass, CAD Environment class with CATIA Environment sub-class is present.
-
Click on next and verify that two new attributes, CAD Version and CATIA Environment are present in the List of Attributes for the Class Documents.

-
Click Create.
Updating the Profile Card
To update the profile card:
-
Launch SmarTeam, and select the Admin button on the Browser toolbar.

-
After clicking the Admin button, add CATIA Environment as shown below:
-
The CATIA Environment Profile Card appears.

-
Fill in the necessary information in the Profile Card as shown for the new CATIA Environment OEM1.
-
In Attributes1, fill in the complete string as shown below in exactly the same manner.
-
Similarly, add two more Environments and fill the information accordingly in Profile Card for OEM2 and OEM3.
-
Create a profile card in Admin Class, OEM Environment sub-class. In this profile card, adds three fields ID, Name and Environment as shown in the following table:
ID ID Char 128 Case Sensitive Name Name Char 128 Case Sensitive Environment Command Environment Command Char 256 Case Sensitive -
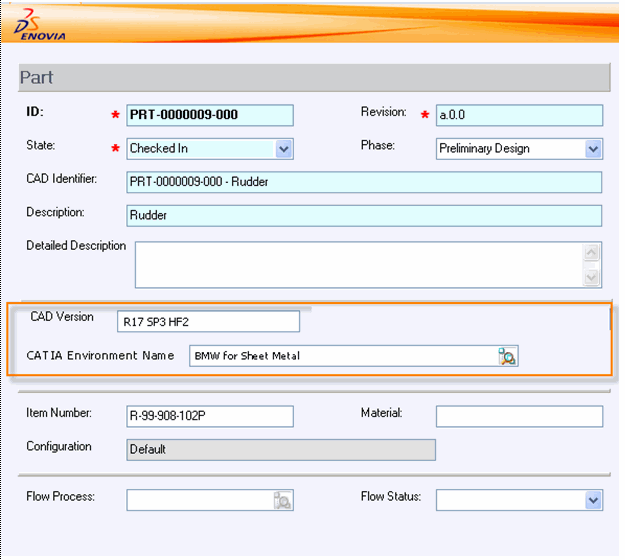
Add the following two fields to the CATIA Documents profile card:
- CAD Version
- CATIA Environment Name (reference to class to OEM Environment sub-class).
-f ‘%1’ –e ‘OEM1’ –c “D:\Program Files\Dassault Systemes\B19D10\intel_a\code\bin\CATSTART.exe” –run “CNEXT.exe” – env OEM1 -direnv “C:\Documents and Settings\fnj\Application Data\DassaultSystemes\CATEnv” –nowindow’
Note: In the –c path, type the shortcut for the CATIA Environment OEM1.
Integration Tools Setup
In the SmarTeam Integration Tools Setup, define the CATIA Environment Attribute to map to the OEM environment.
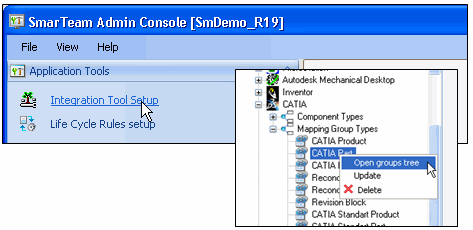
- In SmarTeam, go to Admin Console and launch Integration Tool Setup.
- Under CATIA, select Mapping Group Types and then CATIA Part.
- Right click and select Open groups tree.
- Under Engineering Information, add a new Group under OEM Environment.
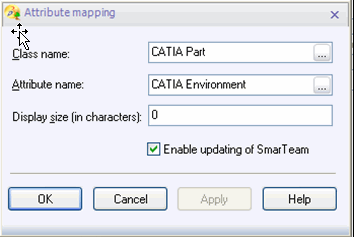
- Map from CATIA Part to CATIA Environment as shown.
- Select the Enable updating of SmarTeam checkbox and click OK.
- Similarly, map from CATIA Product to CATIA Environment and CATIA Drawing to CATIA Environment.
CATIA Environment Definition and Registration in SmarTeam
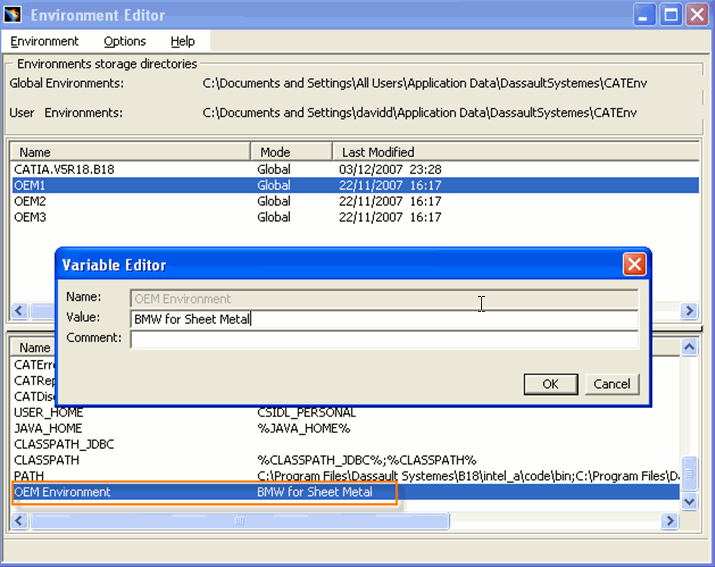
Using the CATIA Environment Editor, the administrator defines a CATIA Environment.
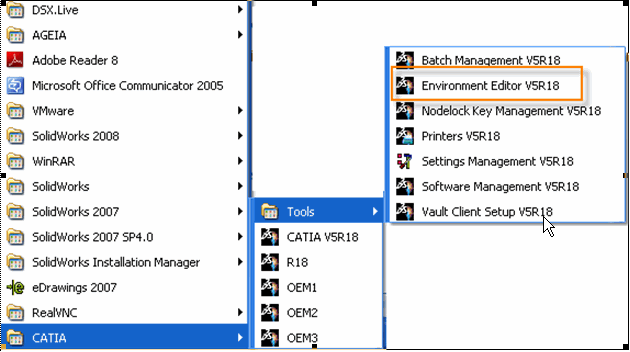
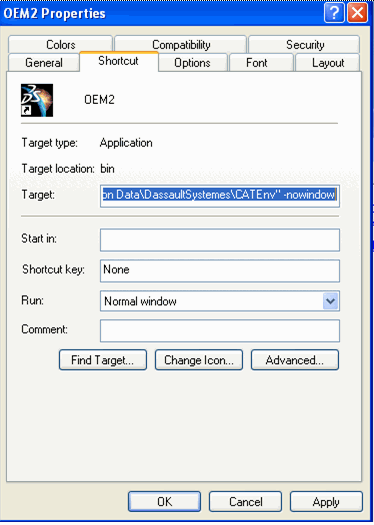
After this has been created, a shortcut containing a command line appears.
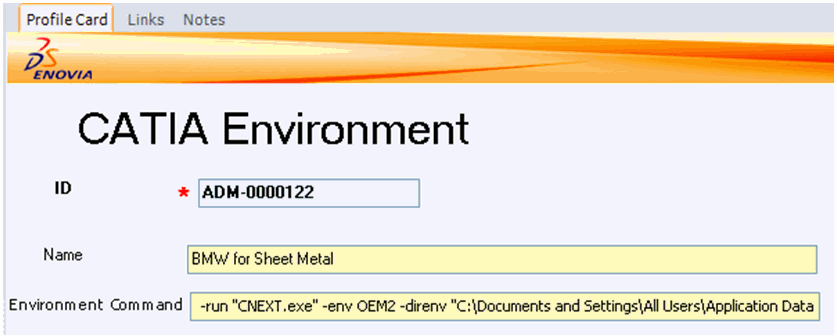
- Access SmarTeam and create a new object under Admin class, CAD Environments sub-class, CATIA Environments leaf class.
- The ID is filled in automatically. Type the name of the supplier in the Environment Name field. In the Environment Command field type the command.
- Continue to add CATIA Environments as required.
In the Environment Editor, the administrator can define and set a new variable as follows:
- Name: OEM Environment
- Value: OEM Environment Name
CATIA Environment Preparation
The administrator creates an object for each environment in the CAD Environment class. The name must be identical to OEM Environment value defined in CATIA Environment Editor.
The administrator will set the command in following format:
-f '%1' -e '<Environment Name>' -c '<Environment
				Command>'
Please note the syntax of the command:
-f<space>'%1'<space>–e<space>'<Environment Name>'<space>-c<space> '<Environment Command>'
The String corresponding to -f,-c & -e MUST be enclosed in the single quotes ( ' ' )
-f '%1' represents file name that need to be opened in CATIA
-e '<Environment Name>' represents Environment Name
-c '<Environment Command>' represents Environment Command as it appears in shortcut
Example of Environment Command:
-f '%1' -e 'BMW for Sheet Metal' -c '"C:\Program Files\Dassault
		Systemes\B19\intel_a\code\bin\CATSTART.exe" -run "CNEXT.exe" -env OEM2 -direnv
		"C:\Documents and Settings\davidd\Application Data\DassaultSystemes\CATEnv"
		-nowindow"'
In the profile card, the Environment command is shown in the Environment Command field.
Application Setup
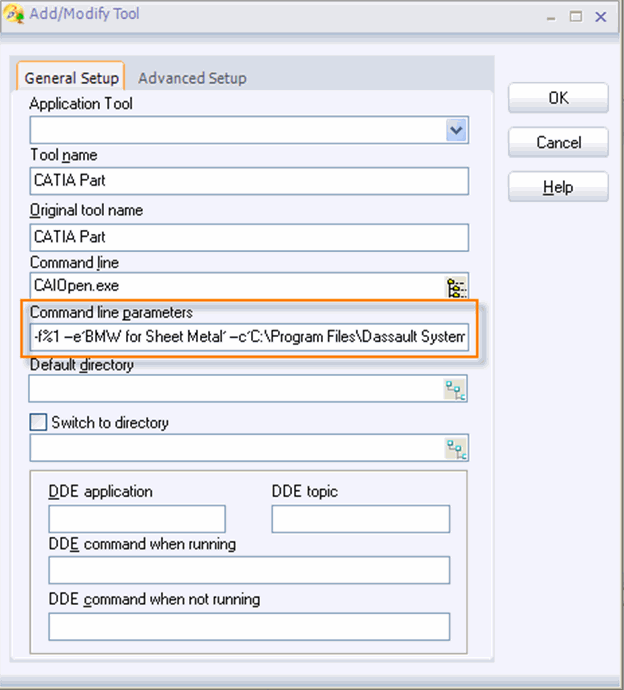
The administrator set application sets, in Command line parameters, the default environment to be launched in following cases:-
• If the Environment Name is empty in CATIA document object
• If the object with the Environment Name does not exist
 |