 |
This task teaches you how to associate your own icon to a
Tooling component in the specification tree, by inserting a parameter
IconRef in the Tooling component CATPart. |
 |
- You must be familiar with the insertion of parameters.
Refer to Parameters in CATIA Infrastructure.
- The steps below must be carried out before inserting the Tooling
component.
- If the parameter IconRef is not defined, or is not locked
nor hidden,or if the .bmp
file is not found, the standard icon will appear in the specification
tree.
|
 |
-
If it does not yet exist, create the icon file. It must:
- be in bmp format,
- have a .bmp extension,
- not exceed 22x22 pixels,
- have the same properties as the standard icons found in the
specification tree.
|
-
Save the icon in a dedicated directory.
Enter the path of this directory as the value of the variable
CATGraphicPath
(Refer to Customizing Your Environment... in the
Installation and Deployment Guide).
-
Customize the CATPart or the CATProduct corresponding to
the Tooling component:
- Insert a new parameter of the type String, named
IconRef in the CATPArt or the CATProduct.
- Enter the name of the .bmp file as the value of this parameter.
example: IconRef=C_MyComponent
- Hide and lock this parameter.
- Save the CATPart or the CATProduct.
|
-
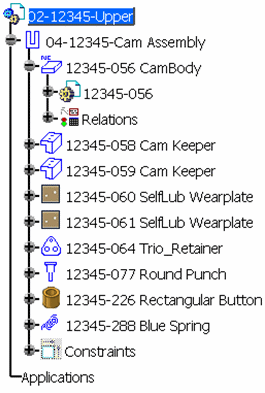
Insert the Tooling component. It is displayed with the
customized icon in the specification tree.
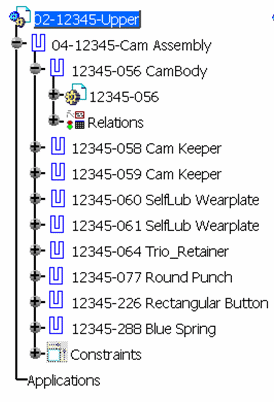
Specification tree with standard icons:

The same with customized icons:

|
 |
The parameter IconRef is hidden and locked. Even if you change
its value (i.e. if you change the icon), the icon displayed in the
specification tree will remain the same. |
|
 |