This task shows you how to generate a 2D Display visualization of a sensor.
-
You can generate a 2D Display visualization only in case of multi-occurrence solutions (frequency, dynamic response, ...).
-
The computation of the solution containing the sensor is automatically launched when you use this functionality.
The computation process may be long.
Open the sample59.CATAnalysis document from the samples directory.
-
Compute all the solution.
To do this, click Compute .
.
-
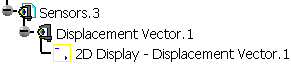
Right-click the Displacement Vector sensor under the Sensor.3 set in the specification tree and select Generate 2D Display
 .
.The corresponding view appears in a 2D Display document.

-
Close the window to retrieve the CATAnalysis document.
A 2D Display object appears in the specification tree.
You can retrieve the 2D view and edit it.
To do this, double-click the 2D Display object in the specification tree.
-
For an easier navigation between the two documents, select the Tile Horizontally or Tile Vertically submenu of the Window menu.
-
You can edit several graphic parameters.
For more details, refer to Editing 2D Display Parameters.
![]()