The Systems Space Reservation product is a prerequisite.
For more information about it, refer to
Systems Space Reservation User's Guide.
Open a document containing at least a schematic system and its corresponding 3D implementation through item/path reservations.
-
Click the Automatic Routing
 button.
 -
Select a cable or a diagram document.
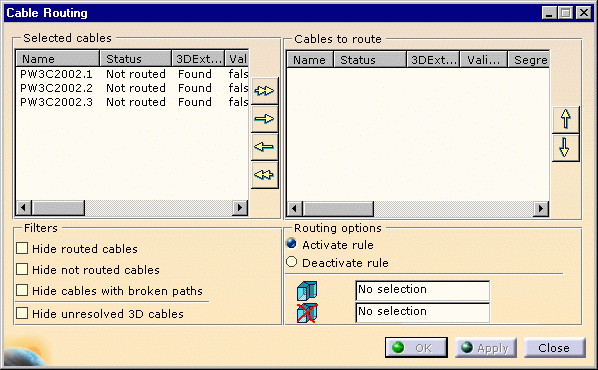
The Cable Routing list opens:
It shows the cables as well as other cable attributes:
- name: name assigned to the cable
- status: routed OK, not routed, routed KO (route not OK)
- 3D extremities: found, not found
- validated route: true, false
-
Select one or more cables in the list.
-
Click the right arrow or the multiple arrow if you want to route all the cables.
-
Choose the appropriate options:
- activate or deactivate a rule defined in the Tools -> Options... menu (The settings for Tools->Options are described in Customizing.
- recommend and/or forbid segments for routing.
-
Click OK to validate the entries made.
The routing is performed.
The Routing Report window opens, and you can see the result.
![]()