-
Select Edit > Sheet Background from the menu bar.
-
Click Frame and Title Block
 in the Drawing toolbar.
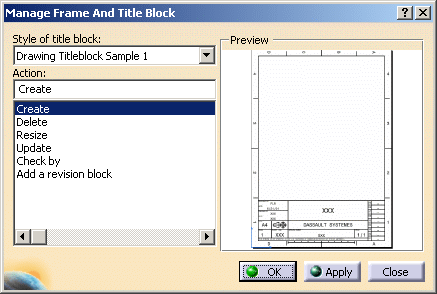
The Manage Frame and Title Block dialog box is displayed.
-
Choose a macro from the Style of title block drop-down list. For the purpose of this exercise, choose Drawing Titleblock Sample 1. A preview of the frame and title block is displayed.

-
Select the action you want to perform in the Action list.
-
Create: creates the frame and the title block
-
Delete: deletes the frame and the title block
-
Resize: resizes and updates the frame, the title block and the working views (if you change the page format in File> Page Setup)
-
Update: updates the frame and title block, as well as the fields in the title block (part-related and sheet-related information)
-
Check by: completes the "Checked by" field and automatically update the verification date
-
Add a revision block: adds a revision block

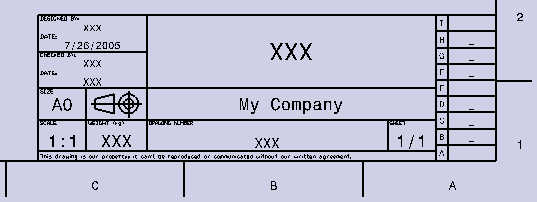
Information which is not available in the part will be substituted by "XXX" in the drawing. -
-
Click OK in the Manage Frame and Title Block dialog box. The frame and title block appear in the drawing.

-
To exit the background view, select Edit> Working Views from the menu bar.
About customizing frames and title blocks using macros
To customize frames and title blocks using macros, you must be familiar with Visual Basic. Refer to the Automation Documentation for more information.
Specifying the location of frame and title block macros
To know where frame and title block macros are located, go to Tools> Options> Mechanical Design> Drafting> Layout tab. The field available in the Background View section indicates the path to the directory containing these macros. You can add new macros in the specified directory, and/or you can change this location by editing the field.
Creating preview images
You can create a preview image of the frame and title block that will be displayed in the Manage Frame and Title Block dialog box. When saving this preview image this, make sure you do the following:
-
Save the preview image as a bitmap file (.bmp extension) bearing the same name as the macro. For example, if your macro is called CustomMacro.CATScript, then the preview image should be named CustomMacro.bmp.
-
Save the image in the directory which contains the macros. For example, if your macro CustomMacro.CATScript is located in the CustomMacros directory, then the preview image CustomMacro.bmp must also be located in the CustomMacros directory.
Modifying existing actions or adding new actions
Available actions for a given macro are listed in the Action list in the Manage Frame and Title Block dialog box. You may modify existing actions by modifying existing Sub procedures.
You can also add new actions by defining new Sub procedures. There are a couple of things you need to remember when doing this:
-
All Sub procedures must be prefixed using CATDrw_: for example, Sub CATDrw_CustomProcedure().
-
If no argument is associated to the procedure, for example: Sub CATDrw_CustomProcedure (): the sub procedure is called when the user selects the corresponding action.
-
If one argument of type CATIABase is associated to the procedure, for example: Sub CATDrw_CustomProcedure (CATIABase sheet): the argument is set to the current sheet.
Modifying the name of a style/action
In the Manage Frame and Title Block dialog box, the names displayed in the Style of title block and Action lists can be modified.
By default, the name of a style is the name of the corresponding CATScript file (without extension). By default, the names of the related actions are those written in the CATScript file (without the CATDrw prefix).
Example: in a CATScript file, a function called CATDrw_XXXX creates an action called XXXX in the Action list.
To create a customized name for a style or action, proceed as follow:
-
Edit the FrameAndTitleBlock.CATNls file located in the resources/msgcatalog folder.
-
Add one of these command lines:
For a style:
Drawing_Titleblock_StyleOfTitleBlock="Customized name";For an action:
		Drawing_Titleblock_StyleOfTitleBlock.CATDrw_NameOfAction="Customized
		name";