Swept Volume functionality:
You can simplify the swept volume and wrap it to obtain a much cleaner swept volume. You can simplify the wrapped swept to make it even lighter.
When performing a swept volume followed by a wrapping
operation, you can calculate both in one operation, with a parallelization
of the computation and if necessary a saving operation of temporary files
on disk. Thus, much longer tracks can be used and largest models too.
We recommend you to use spatial split when
handling large models (i.e. a model presenting tracks with numerous
positions).
-
Manage automatically your result as an alternate shape. For this:
- Select Tools > Options from the menu bar.
The Options dialog box is displayed. - Expand the Digital Mockup category from the left-hand tree.
- Select DMU Optimizer item to display the corresponding tab. The Alternate Shapes Management is available
- Select the Swept Volume check box: it is automatically activated as an alternate shape. When activated the swept volume representation is the one visualized in session.


Make sure your simulation or track is set to the beginning step before launching the swept volume computation. - Select Tools > Options from the menu bar.
-
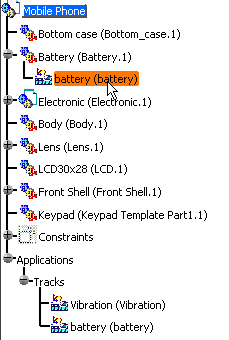
Select the products to sweep. In our example, select the battery track in the specification tree
-
Click Swept Volume
 .
.
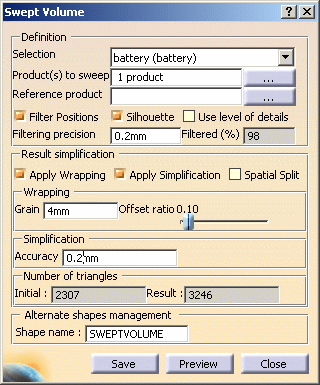
The Swept Volume dialog box is displayed.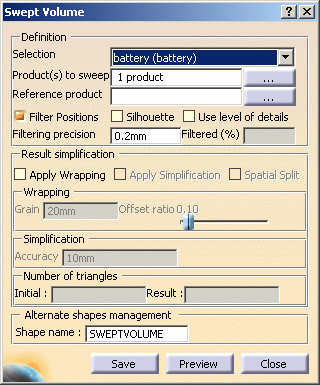
-
(Optional) you can also compute a silhouette before the swept volume. This is very useful when handling large models as the silhouette operation removes useless triangles.
-
Click Preview to obtain a preview.
The progress bar is displayed letting you monitor and, if necessary, interrupt (Cancel option) the calculation.
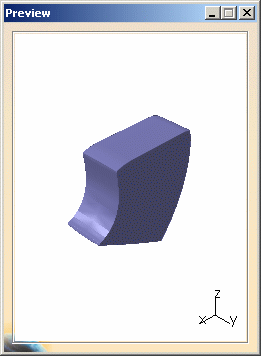
Now you want to simplify the swept volume result, you are going to reduce the number of triangles used to create the resulting shape, first wrapping the swept volume and then applying a simplification on the wrapping result. -
Select the Apply Wrapping check box
-
Set the grain by entering a value. In our example, keep the default value 4mm
-
Set the Offset Ratio. In our example, keep the default value
-
Click Preview
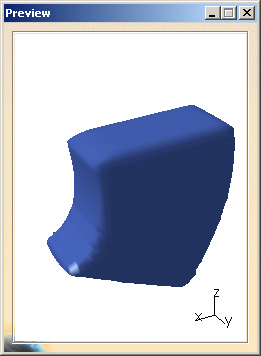
The number of triangles representing the wrapping result is displayed in the Number of triangles field as shown below: 
-
Select the Apply Simplification check box (on the wrapped swept volume)
-
Enter 0.2mm in the Simplification accuracy field
-
(Optional, i.e. when dealing with a track presenting numerous positions or dealing with a large digital mockup), you can select the Spatial Split check box.
For more detailed information, refer to More about the spatial split option. -
Click Preview to launch the calculation. This is what you obtain:
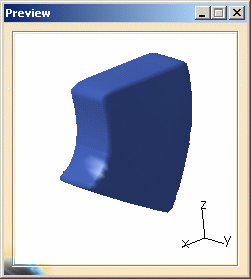
The number of triangles representing the simplification result is displayed in the Number of triangles field as shown below:
The simplification representation is coarse but the number of triangles has been drastically reduced.

-
Click Save. The Save As dialog box automatically appears
-
Select cgr file from the Save as type drop-down list, enter a meaningful name and click Save.
-
Click Close to exit the Swept volume command
This is what you obtain: 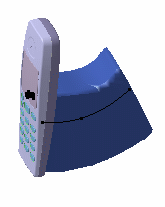
Your swept volume is managed as an alternate shape, therefore, it is automatically inserted into your product and replaces the original component (Battery.1)
![]()