 |
This task shows you how to add materials to your Composites part and
how to edit their parameters:
In pre-R18 models:
- Zones are linked, via the Laminate, to materials inside a
CATMaterial.
If the CATMaterial is not available, the zone laminate is KO and the
following cannot be created:
- Plies from zones,
- Solid/top surface from zones.
- Each ply is linked to a material inside the CATMaterial
if the CATMaterial is not available, the ply is KO and the following
cannot be created:
- Solid from plies
- Exploded surfaces
- Producibility/ Flatten
- etc.
In short, nothing can be done with a Composites CATPart if the
corresponding CATMaterial is not available, which causes numerous issues
especially when sending models to a partner for example.
Starting with R18, you can define the Composites Parameters by
selecting only the required materials from one or several catalogs,
instead of selecting a whole material catalog. This enables the
Composites Parameters to store a list of material cache features
that will each have:
- a list of knowledgeware parameters corresponding to the material
properties needed to update the CATPart even if the material catalog is
not available,
- a link to the corresponding material in a material catalog.
Please note:
- that not all material parameters are stored in the Composites Parameters.
This means that a FEA analysis cannot be
performed if the catalog is not available.
- The materials proposed in the commands defining zones and plies are
only those defined in the Composites Parameters.
- Instead of having an applied material like in previous releases, the
ply will only a point to the corresponding material cache available in
the composites parameters.
You can no longer apply a material at a ply level.
Replacing a material in all plies will be done through the
rerouting of the material link.
- The laminate feature of zones will no longer point to the materials
in the CATMaterial like in previous releases.
It will now directly point to the Composites materials stored under the
Composites Parameters. This will be transparent for the user.
- Pre-R18 models need to be updated.
-
.
|
 |
Available in Composites Engineering Design (CPE)
and Composites Design for Manufacturing (CPM). |
 |
Open the
Parameters1.CATPart document |
 |
Adding Materials
-
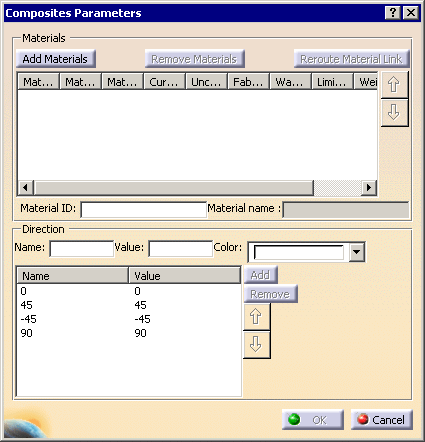
Click Composites
Parameters  . .
The
Composites Parameters dialog box is displayed.
-
Click
Add Materials. The Materials
dialog box is displayed:
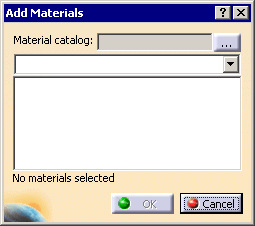
Click ... and use the File Selection box to select a catalog of
materials. The Materials dialog box is updated with the list
of the materials contained in this catalog.
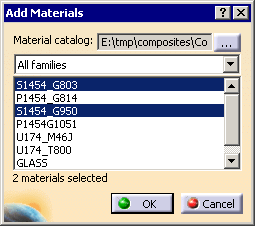
The drop-down list allows you to filter the materials by family. By
default it is set to All Families.
Select the materials (at least one) you want to use (multi-selection is
available) and click OK.
You can repeat this step with another material catalog to select more
materials.
-
The Composites Parameters dialog box is
updated.
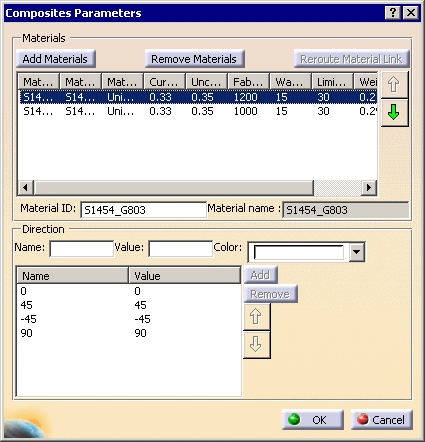
All columns, as well as the dialog box, are resizable, e.g.:

Those columns list the material properties needed to update the CATPart:
|
 |
The parameters listed above are read from the material. If those
parameters are not visible, it indicates that the material link is broken. |
|
|
-
Use the Up and Down arrow to change the order of the
materials in the table (and in commands defining zones and plies).
-
The name of materials can be very long. They are
displayed in the Material Name field, that cannot be edited.
You can give the material a shorter name in the Material ID
field.
-
In the Direction
field, you can enter a new
fiber direction to add to the existing list.
Enter the name, the value and the color of the
direction, then click Add.
Use the Up and Down arrows to change the order of the
direction values, and Remove to remove a value.
-
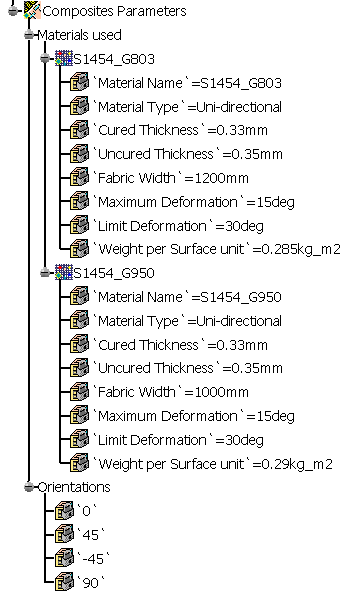
Click OK. The material cache features are
stored under the Composites Parameters node:
|
 |
- A contextual menu is available on the material cache features:

- You can edit the Composites Parameters and add new
materials even after zones and plies have been created.
-
Note that the ply points to the material cache feature stored in the
Composites Parameters.
|
 |
-
-
-
|
 |
|
|
|
-
-
-
|
 |
|
|
|
-
-
|
 |
|
 |
|
|
 |


