This task shows you how to create a bead, that is a local deformation in the web.
If you use the Generative
Sheetmetal Design workbench, open the
NEWStamping6.CATPart document.
If you use the Aerospace SheetMetal Design workbench, open the
Aero_Stamping6.CATPart document.
-
Click Bead
 .
. -
Select the spine profile where you want to place the bead.
The Bead definition dialog box is displayed, providing default values. 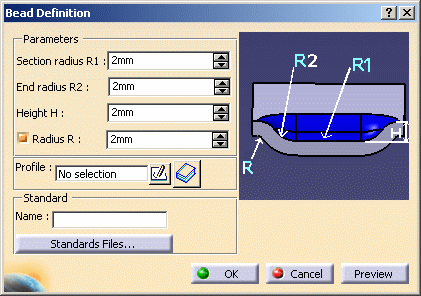
-
Change the value in the different fields, if needed:
-
Section Radius R1 (corresponding to the cross section value)
-
End Radius R2
-
Height H
-
Radius R
The Profile is automatically set to the sketch you chose. The vector for the direction of the bead is shown in the model and a preview of the bead appears. A vector shows its direction. 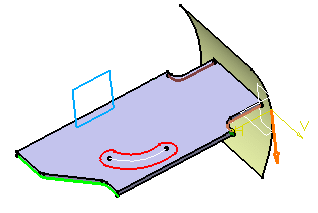
-
-
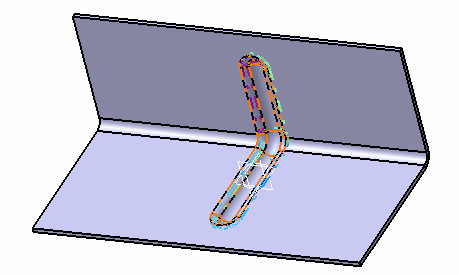
Click OK to validate.
The bead (identified as Bead.xxx) is created and the specification tree is updated accordingly. 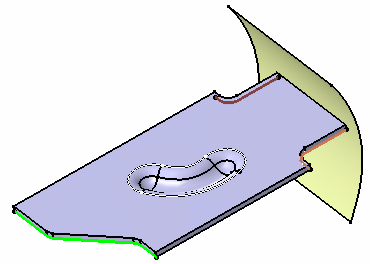

The vector cannot be reverted until the bead spine is defined. 
You can use 0 as the Radius value to deactivate the Radius R value, and to create the bead without a fillet. 
- You can also create a bead using a 3D curve such as shown here:
- Refer to the Customizing Standard Files chapter for information on defining the Standards Files.
- You can also create a bead using a 3D curve such as shown here:
![]()