 |
This procedure describes how to
create a
release activity to simulate a robot, other kinematic device, or
manikin releasing a device or part.
This procedure contains two sections:
|
 |
This procedure assumes that your PPR tree
contains the necessary parts and resources to perform the release
activity and a grab activity. |
 |
You can create a release activity that
releases parts before you have created a grab activity that grabs parts;
the software does not prohibit release activities that are incapable of
actually occurring. |
 |
Create a Release Activity
|
| |
-
Click Release  from the Simulation Activity Creation toolbar.
 |
If Release
is not visible on the Simulation Activity Creation
toolbar, click on the black arrow on Grab  .
The Grab/Release sub-toolbar appears; access
Release
from the sub-toolbar. .
The Grab/Release sub-toolbar appears; access
Release
from the sub-toolbar. |
| |
 |
| The Activity Creation Options dialog
box appears asking where to place the activity. Depending on which
resource is releasing the activity, you place the activity
directly within the process or within a task of the resource
(e.g., a robot or manikin task). |
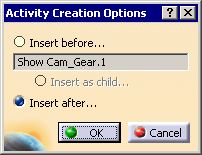 |
-
Select the location for the activity and click OK.
|
The Release Activity dialog box below
appears. |
 |
|
|
- To release all of the parts held by another part, select the
Part used to perform release option. You can only
select one part for this option.
- To release one or more selected parts, select the
Part(s) to release option.
|
-
Select the device, part or parts you want released.
|
A release activity appears in the PPR tree. |
|
|
Only one field can be accessed once you have selected
Part(s) to release or to a Part used to perform release.
To change your option, use the Reassign button to
cancel the selections or deselect the selected parts by clicking
them. |
| |
All selected objects are highlighted. |
|
|
Edit a Release Activity
|
| |
-
Double click on the
release activity in the PPR
tree.
|
The Release Activity dialog box
appears. |
 |
-
Select the Reassign button.
|
The fields in the dialog box become blank. |
|
-
On the PPR tree, select the part(s) you want released
or the part you want to perform the release.
|
As you select the part, it appears in the box and
it is highlighted on the geometry. |
-
Select the Accept button.
|
|
If you only want to remove or add parts from or to the
existing list of objects, you can skip Step 2 and deselect or
select the desired parts. |
|
|
|
If you make a mistake when
selecting the part, you can:
- Press the Cancel button (which will leave the activity
as it was, prior to your attempt to alter it), or
- Press the Reassign button, which will clear the dialog
box again, or
- Deselect the unwanted part by clicking on it.
|