|
This task shows you how to use
Quick Translate  to move elements.
This function allows the user to
transfer an element relative to a location on another element.
The possible elements are:
- Points

- Lines

- Planes

- Connectors

The possible translations are provided in the table following:
| If the From Element
is: |
The To Element can
be... |
| Point |
Line |
Plane |
Connector |
| Point |
yes |
yes |
yes |
yes |
| Line |
yes |
no |
no |
yes |
| Plane |
yes |
no |
yes |
yes |
| Connector |
yes |
yes |
yes |
yes |
Once the From element is selected, the buttons for any
unusable To elements become unavailable.
An object or element moved using this command does not rotate. |
 |
-
With your document open, click
Quick Translate .
| The Translate dialog box opens. |
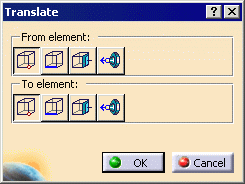 |
-
From among the buttons in the From element:
and To element: section of the dialog box, select the
type of transfer preferred (e.g., Point-to-Point, Point-to-Plane).
 |
If you select a connector on a part to translate, the compass
snaps to the connector's origin. The Distance
field becomes 1000mm in the Z direction.
You can enter a new distance value to move selected part. If you
want to use a reference (to) connector and use an offset value,
enter the value in the Offset field, and then select the
reference connector.
The Distance and Offset values can only be
used with the connectors. |
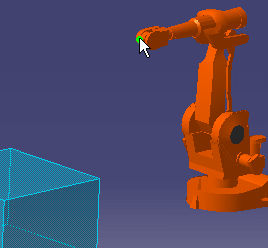
-
Select a feature on the object you want to move (in the
example, the object is the robot; the feature selected is a point).
-
Select a feature (in the case of the example, a plane)
on the To object.
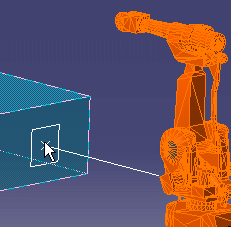 |
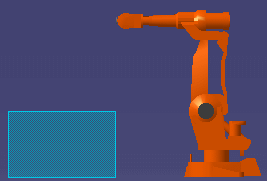
| The transfer occurs when you click on the To object. |
| In this case, the object or element has moved, aligning the
selected point with the selected plane. |
 |
|