-
Click Offset Plane
 .
. -
Define the reference plane by taking the following steps:
-
Place your cursor over a geometric element that defines the plane (e.g., a construction plane, boundary, area contour, item reservation).
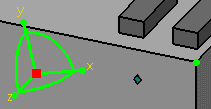
As you move the cursor, a small white rectangle is displayed to show the selectable planes, as shown below. 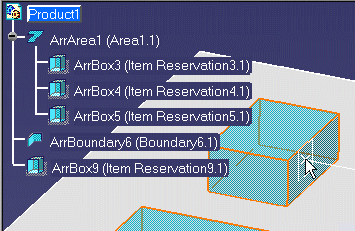

If you do not see the white rectangle, zoom out from the drawing. The white rectangle cannot be displayed if the element under your cursor is displayed too small. -
Click to select the plane.
The white rectangle changes to a blue rectangle, and remains displayed on the reference element, as shown below. 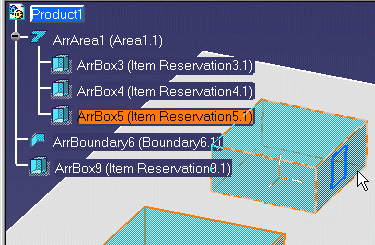
The reference plane can now be used as a reference to position other elements.
-
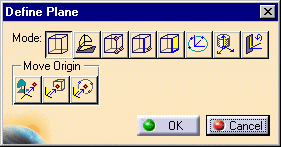
Using Advanced Offset Plane
|
|
Click the Define Plane button to redefine the plane as well as the origin by clicking once on the face. |
|
|
Click the Define Plane using Compass button to redefine the plane using the compass. |
|
|
Click the Define 3-point Plane button to define the plane by clicking on any three points with your pointer. The connector will be placed on the first point you click. |
|
|
Click the Define Line-Point Plane button to select the plane by clicking on a point and a line, like an edge. The connector will be placed on the first point you click. |
|
|
Click the Define Line-Line button to select the plane by clicking on two lines. The plane will be defined by the first line selected. But if the two lines are parallel the plane will be defined as the plane in which both lines exist. |
|
|
Click the Define plane at center of circle button to select the plane by clicking three points on the edge of a circle. This method is used for multi-CAD documents, usually for CGR circles. You can click at points where two lines meet or in the center of a face. The Z axis of the plane manipulator will be placed according to the right hand rule. If you click clockwise the Z axis will point into the object. If you click counter clockwise the Z axis will point out from the object. |
|
|
Click the Define plane at product origin button and then the object to place the plane manipulator on the origin of the object. The plane manipulator axis will match that of the product. |
|
|
Click the Define Orientation button to change the orientation. Click the button and then click a point or a line. If you click a point the X axis will point to it. If you click a line the X axis will become parallel to the line. |
| Define Origin at Plane or Compass allows you to define the origin using the compass or plane command. You use the compass or plane as the base plane along which the origin can be selected. | |
|
|
Define Origin at Point or Center of Face lets you select the origin by clicking on a point or face. |
| Define Origin at Center of Circle allows to select the origin by clicking at three points - the origin will be placed in the center of an imaginary circle drawn using those three points. The plane and orientation will not change when using this command. |