This task shows how to join
surfaces or curves.
This involves:
-
Click Join
 .
. -
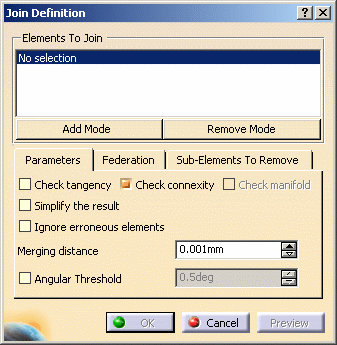
Select the surfaces or curves to be joined.

-
You can edit the list of elements to be joined:
- by selecting elements in the geometry:
- Standard selection (no button clicked):
when you click an unlisted element, it is added to the list
when you click a listed element, it is removed from the list - Add Mode:
when you click an unlisted element, it is added to the list
when you click a listed element, it remains in the list - Remove Mode:
when you click an unlisted element, the list is unchanged
when you click a listed element, it removed from the list
- Standard selection (no button clicked):
-
by selecting an element in the list then using the Clear Selection or Replace Selection contextual menu items.

If you double-click Add Mode or Remove Mode, the chosen mode is permanent, i.e. successively selecting elements will add/remove them. However, if you click only once, only the next selected element is added or removed.
You only have to click the button again, or click another one, to deactivate the mode. - by selecting elements in the geometry:
-
Right-click the elements from the list and choose the Check Selection contextual command.
-
Click Preview.
- An Information message is issued when no intersection is found.

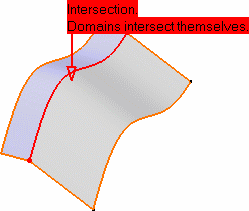
- When an element is self-intersecting, or when several elements intersect, a text is displayed on the geometry, where the intersection is detected.
-
Click Cancel to return to the Join Definition dialog box.
-
Right-click the elements again and choose the Propagation options to allow the selection of elements of same dimension.
- Distance Propagation: the tolerance corresponds to the Merging distance value.
- Angular Propagation: the tolerance corresponds to the Angular Threshold value, if defined. Otherwise, it corresponds to the G1 tolerance value as defined in the part.
Each new element found by propagation of the selected element(s) is highlighted and added to the Elements To Join list. 
Note that: - The initial element to propagate cannot be a sub-element,
- Forks stop the propagation,
- Intersections are not detected.
-
Click Preview in the Join Definition dialog box.
-
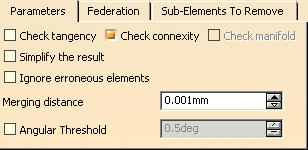
Check Check tangency to find out whether the elements to be joined are tangent. If they are not, and the option is checked, an error message is issued when you click Preview...
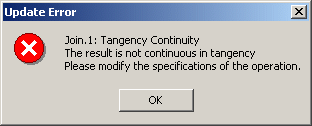
... and elements in error are highlighted in the 3D geometry once you have clicked OK in the Update Error dialog box: 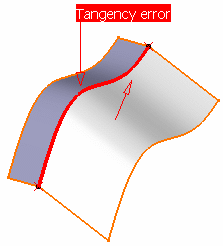

This option works for an angular resolution of 0.5 degree. -
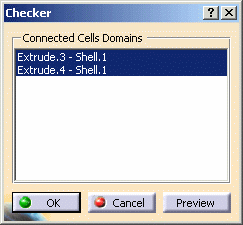
Check Check connexity to find out whether the elements to be joined are connex. If they are not, and the button is checked, an error message is issued indicating the number of connex domains in the resulting join and elements in error are highlighted in the 3D geometry.

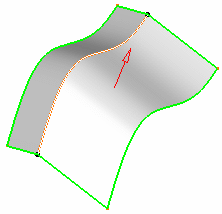
When clicking Preview, the free boundaries are highlighted, and help you detect where the joined element is not connex. -
Check Check manifold to find out whether the resulting join is manifold.

Check manifold is only available with curves. -
You can check Simplify the result to allow the system to automatically reduce the number of elements (faces or edges) in the resulting join whenever possible.
-
You can check Ignore erroneous elements to let the system ignore surfaces and edges that would not allow the join to be created.
-
You can also set the tolerance at which two elements are considered as being only one using the Merging distance.
-
Check the Angular Threshold option and specify the angle value below which the elements are to be joined.
-
Click the Sub-Elements To Remove tab to display the list of sub-elements in the join.
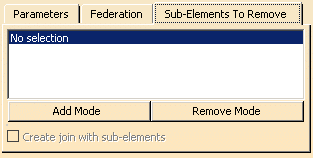
These sub-elements are elements making up the elements selected to create the join, such as separate faces of a surface for example, that are to be removed from the join currently being created.
You can edit the sub-elements list as described above for the list of elements to be joined.
-
Check Create join with sub-elements to create a second join, made of all the sub-elements displayed in the list, i.e. those that are not to be joined in the first join.

-
Click OK to create the joined surface or curve.
The surface or curve (identified as Join.xxx) is added to the specification tree.
![]()
Using the Federation Capability
-
Create the join as usual, selecting all elements to be joined.
(Make sure you do not select Sketch.1). -
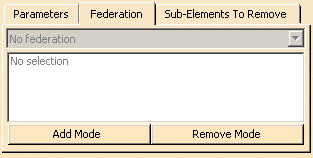
From the Join Definition dialog box, click the Federation tab, then select one of the elements making up the elements federation (providing the No federation and All propagation modes are not selected).
You can edit the list of elements taking part in the federation as described above for the list of elements to be joined. -
Choose a propagation mode, the system automatically selects the elements making up the federation, taking this propagation mode into account.
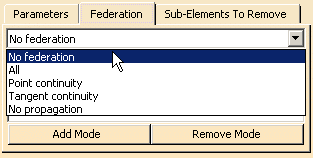
- No federation: no element can be selected
- All: all elements belonging to the resulting joined curve/surface are part of the federation. Therefore, no element can be explicitly selected.
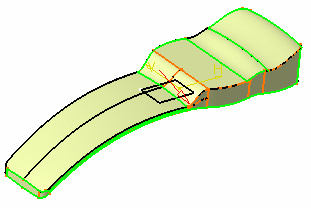
- Point continuity: all elements that present a point continuity with the selected elements and the continuous elements are selected.
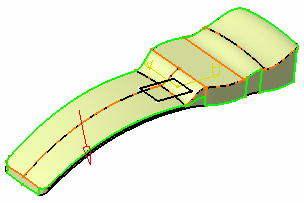
Tangent continuity: all the elements that are tangent to the selected element, and the ones tangent to it, are part of the federation. Here, only the top faces of the joined surface are detected, not the lateral faces. 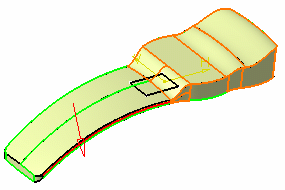

To federate a surface and its boundaries in tangency, you need to select the face as well as the edges: both face and edges will be federated. - No propagation: only the elements explicitly selected are part of the federation.
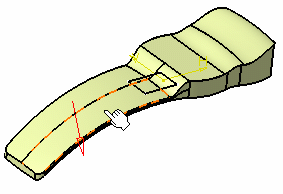
-
Choose the Tangency continuity propagation mode.
-
Move to the Part Design workbench (select Start > Mechanical Design > Part Design), select the Sketch.1, and click Pad
 to create an up to surface pad, using the joined surface as
the limiting surface.
 -
Select the front edge of the pad, click Edge Fillet
 and create a 2mm fillet.
-
Double-click Sketch.1 from the specification tree, then double-click the constraint on the sketch to change it to 10mm from the Constraint Definition dialog box.
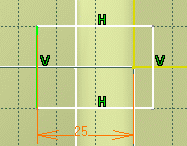
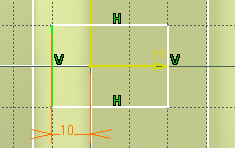
Sketch prior to modification lying over two faces Sketch after modification lying over one face only -
Exit the sketcher
 .
.The up to surface pas is automatically recomputed even though it does not lie over the same faces of the surface as before, because these two faces belong to the same federation. This would not be the case if the federation including all top faces would not have been created, as shown below. -
Double-click the joined surface (Join.1) to edit it, and choose the No propagation mode.
-
Click OK in the Join Definition dialog box.
A warning message is issued, informing you that an edge no longer is recognized on the pad. -
Click OK.
The Update Diagnosis dialog box is displayed, allowing you to re-enter the specifications for the edge, and its fillet. 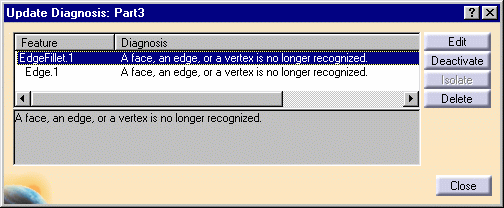
You then need to edit the edge and re-do the fillet to obtain the previous pad up to the joined surface. -
Select the Edge.1 line, click the Edit button, and re-select the pad's edge in the geometry.
-
Click OK in the Edit dialog box.
The fillet is recomputed based on the correct edge.
![]()
